This post and its photos may contain affiliate links. As an Amazon associate I earn from qualifying purchases. If you make a purchase through these links, I may receive a small commission at no extra cost to you.
Did you know that you can turn dollar store canvases into fabulous art work? Learn how to make a reverse canvas using inexpensive dollar store canvases with our easy tutorial.

I’m super excited to show you my latest reverse canvas sign because I’m using canvases from the dollar store. Guess what that means? You can make a reverse canvas sign for less than $5. That price includes the cost of the canvas, vinyl, and other simple craft supplies you might need.

Supplies needed to make A reverse canvas sign
- Canvas (I’m using an 8×10 canvas from Dollar Tree)
- Cricut Explore Air 2 or Cricut Maker
- Cutting Mat
- Iron-on Vinyl
- SVG Cut File (download below)
- Scissors
- Craft Knife
- Black Paint
- Paint Brush
- Cricut EasyPress Mini
- Thumb Tacks
- Permanent Tape Runner or glue dots
How to Make a Reverse Canvas
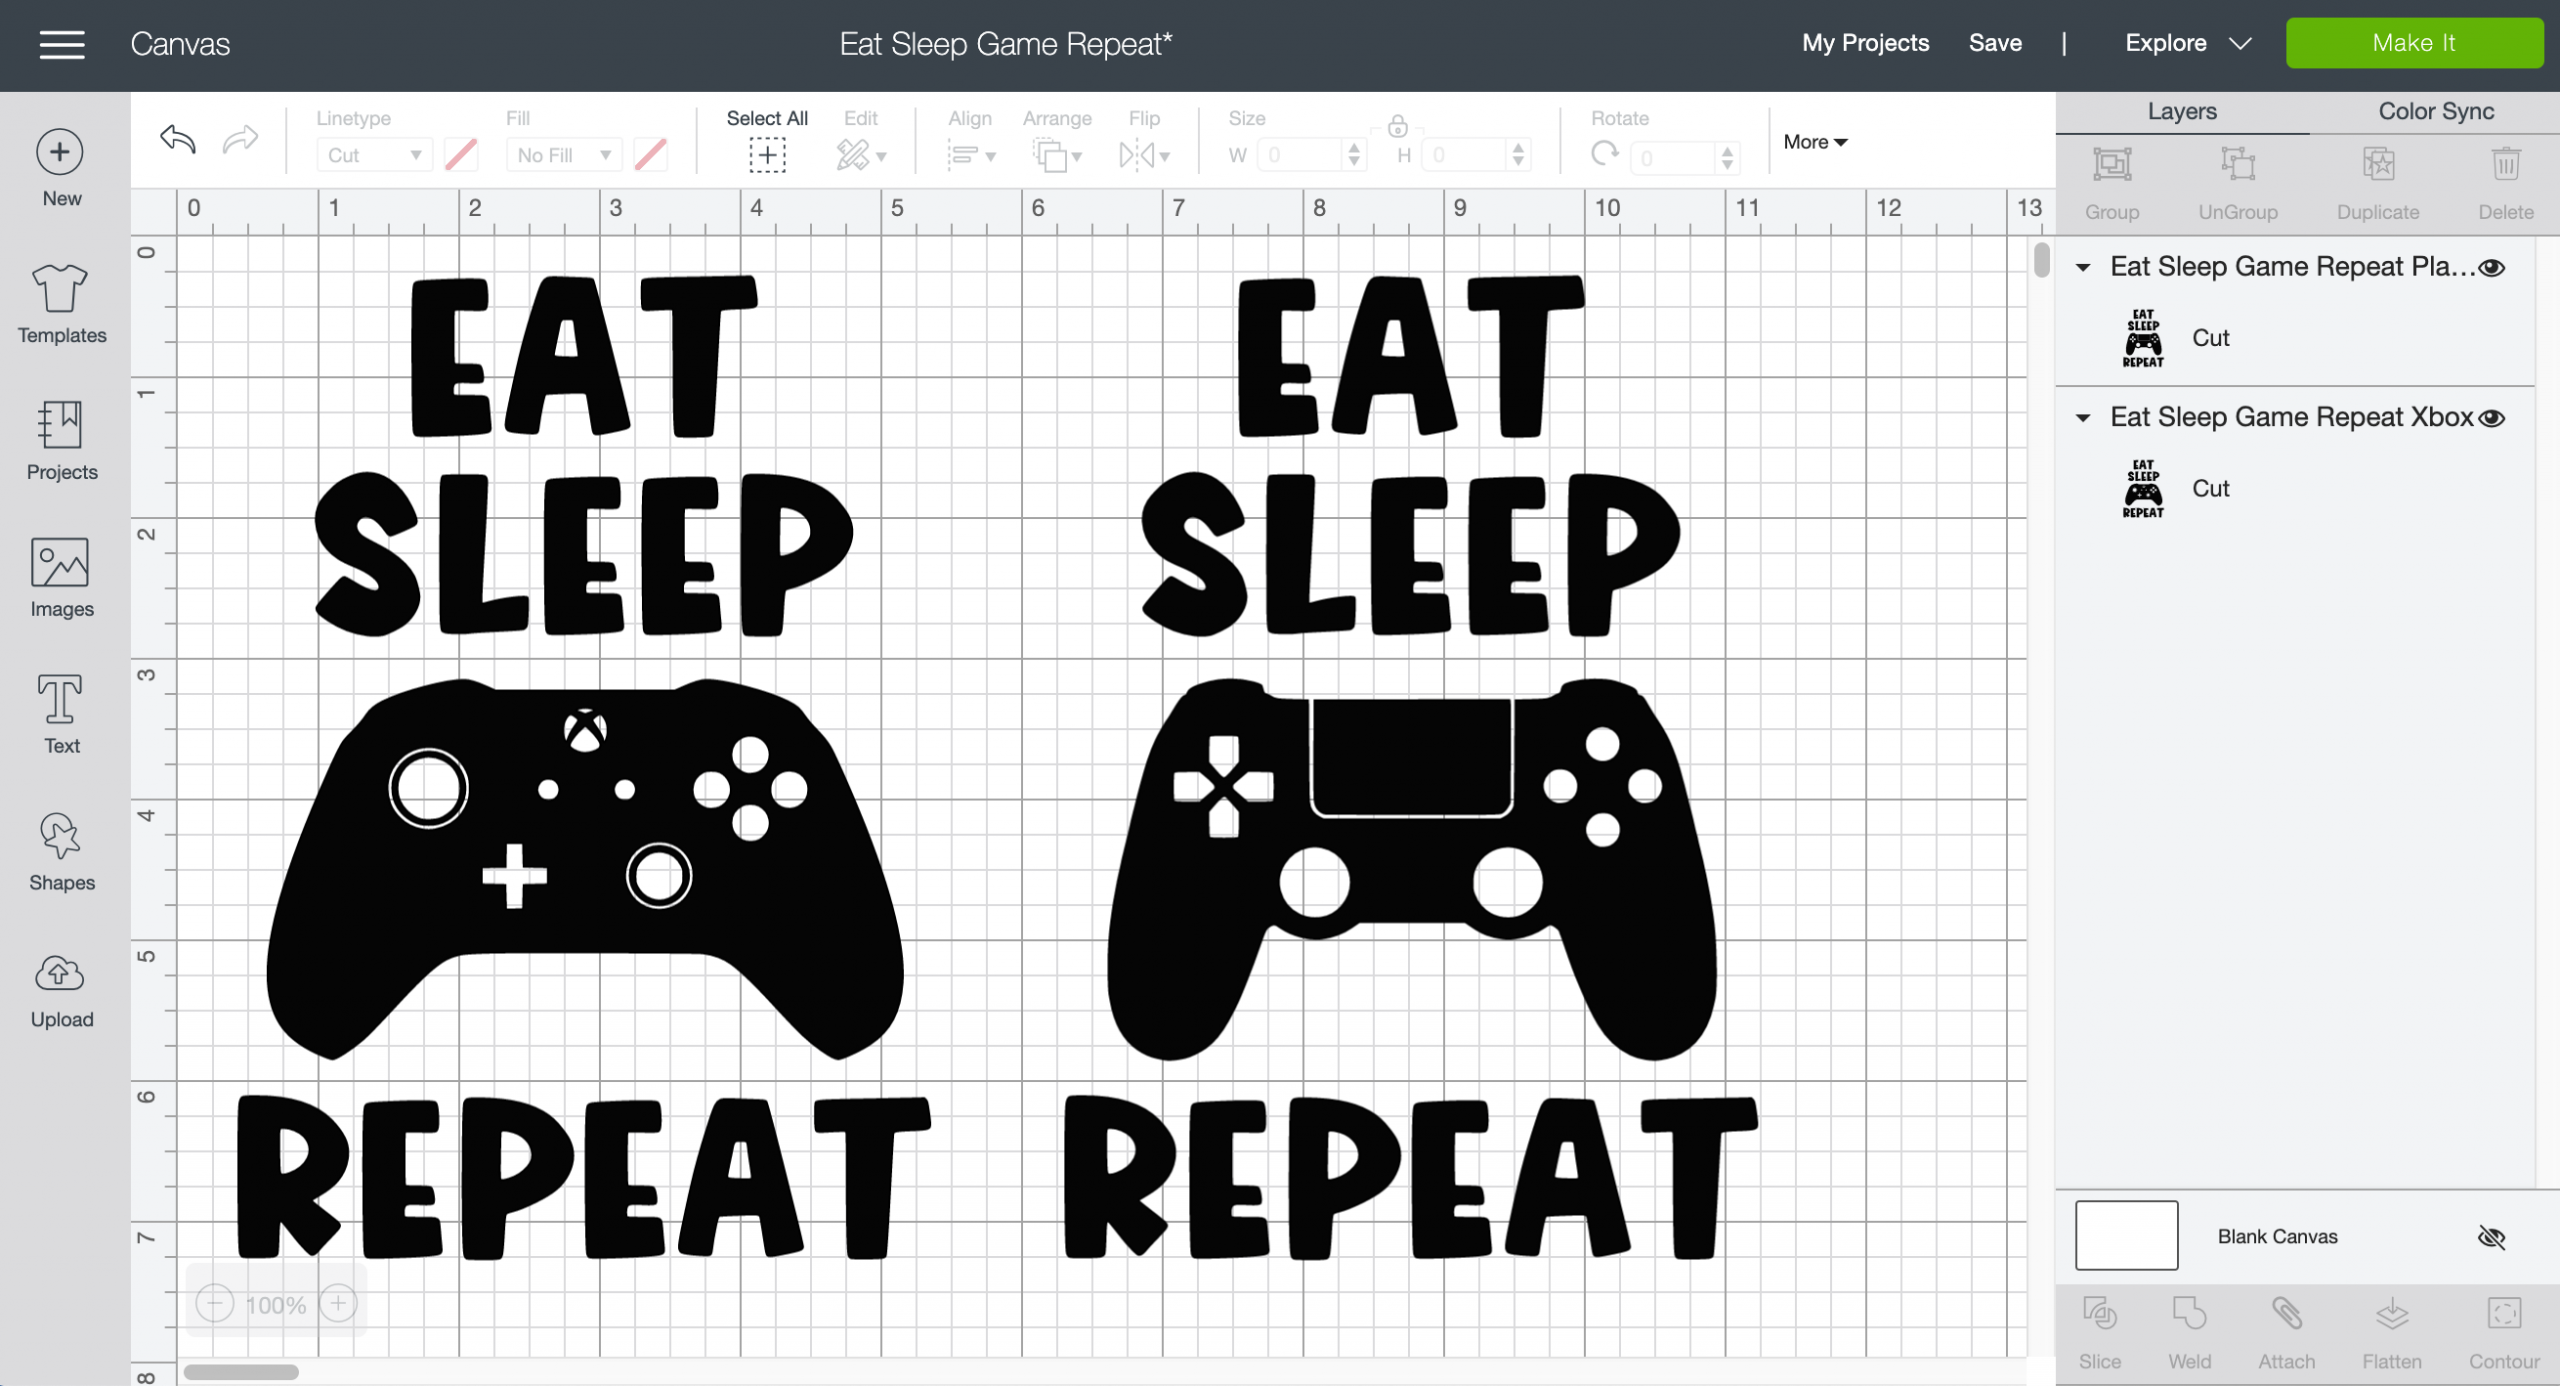
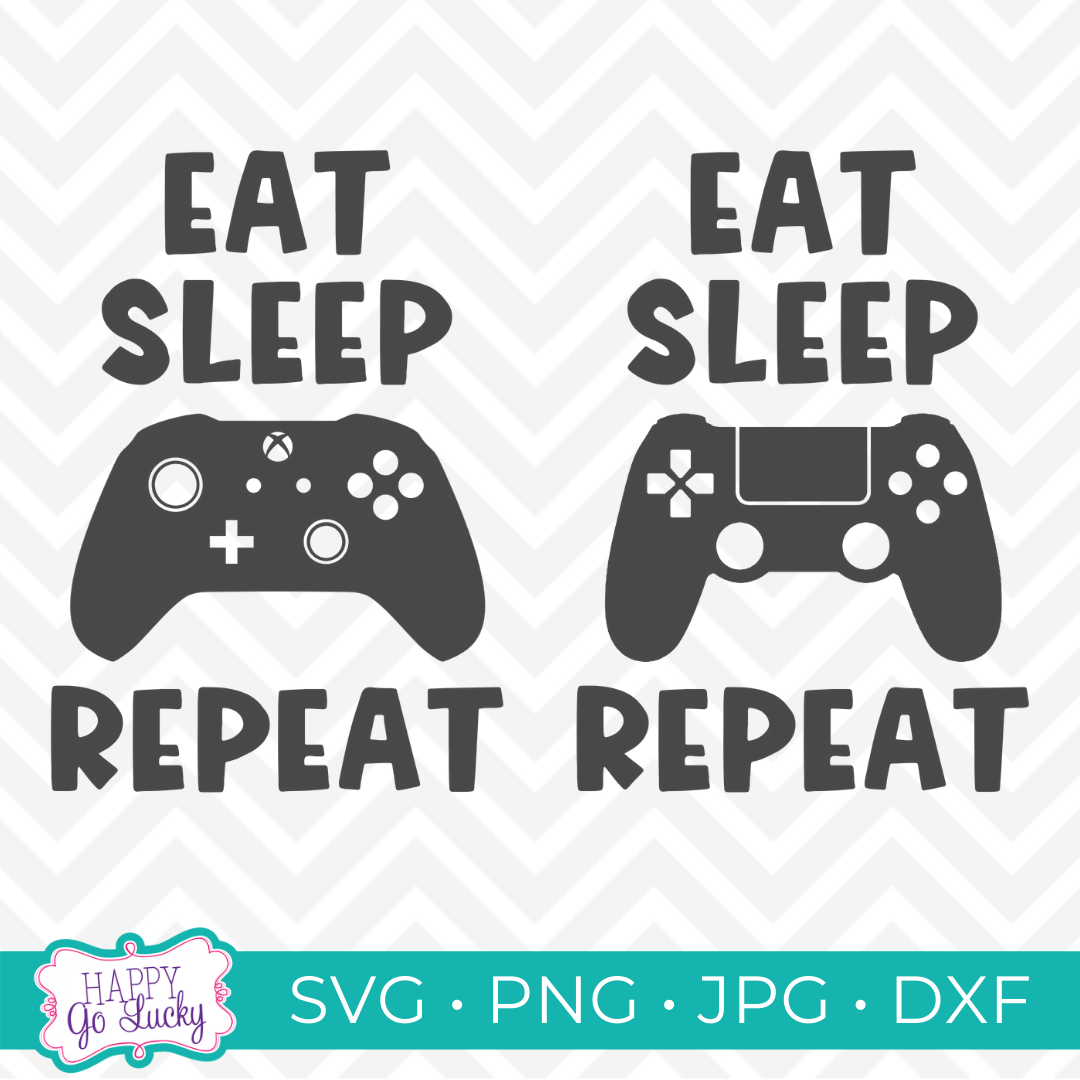
First, use your handy dandy Cricut to cut out your vinyl decal. If you want to use my gaming SVG, you can download it below.
Make sure you don’t forget to mirror the image before cutting. Also, you’ll want to resize the image in CDS to fit the canvas and apply the shiny side of the HTV to the cutting mat before cutting.

Next, remove the canvas from the wood frame using the craft knife. I recommend cutting along the outside of the staples so you have plenty of canvas to work with. I then used my scissors to trim the canvas along the crease.
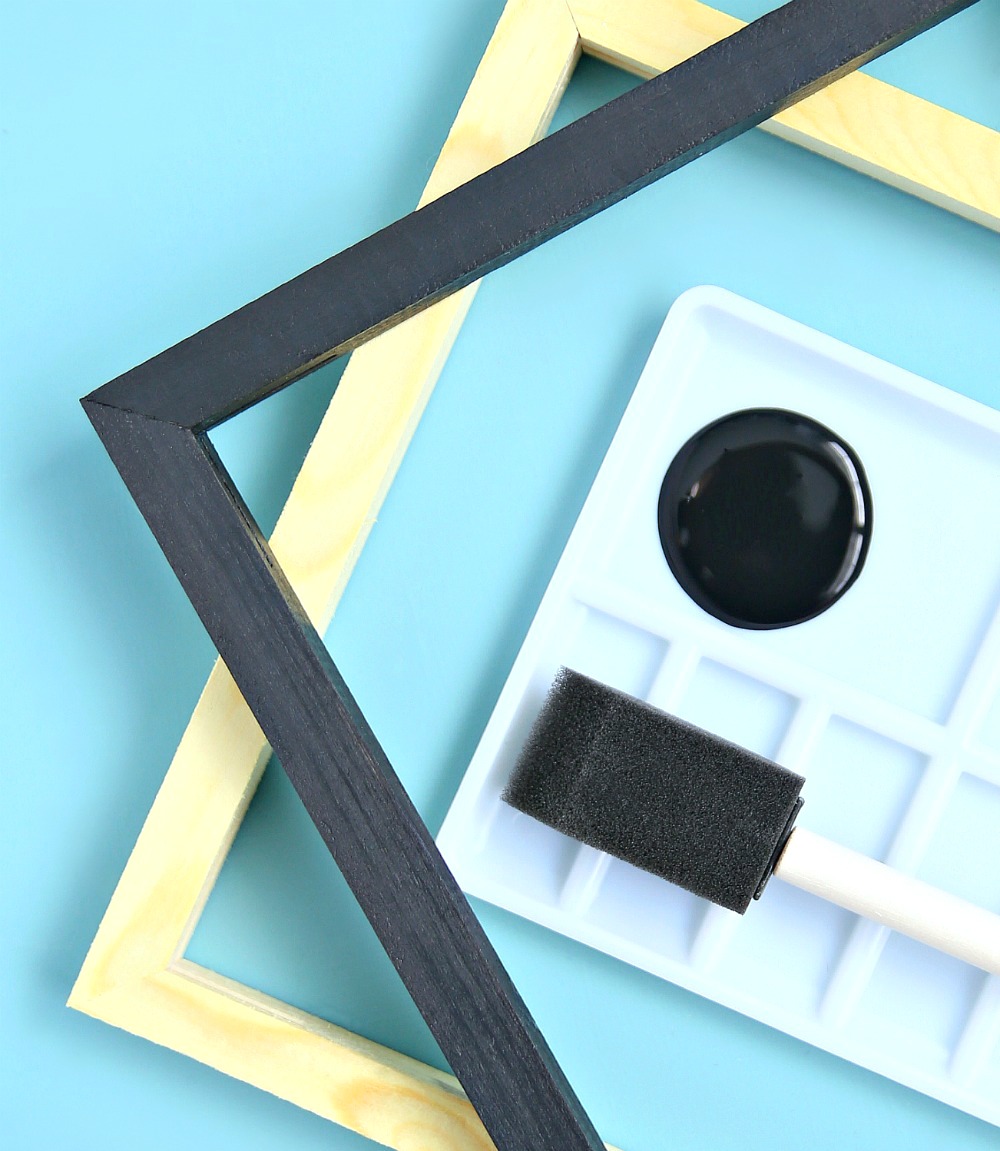
Set canvas to the side and paint the wood frame.

While the paint is drying, it’s time to apply our vinyl image to the canvas. Center the image and use your EasyPress or iron to transfer the image to the canvas. First, preheat the canvas. Then, place the cut design on the canvas with the shiny liner side up. Apply heat for 20-30 seconds. Flip the canvas over and apply heat to the back of the design. Wait 15 seconds before removing liner.
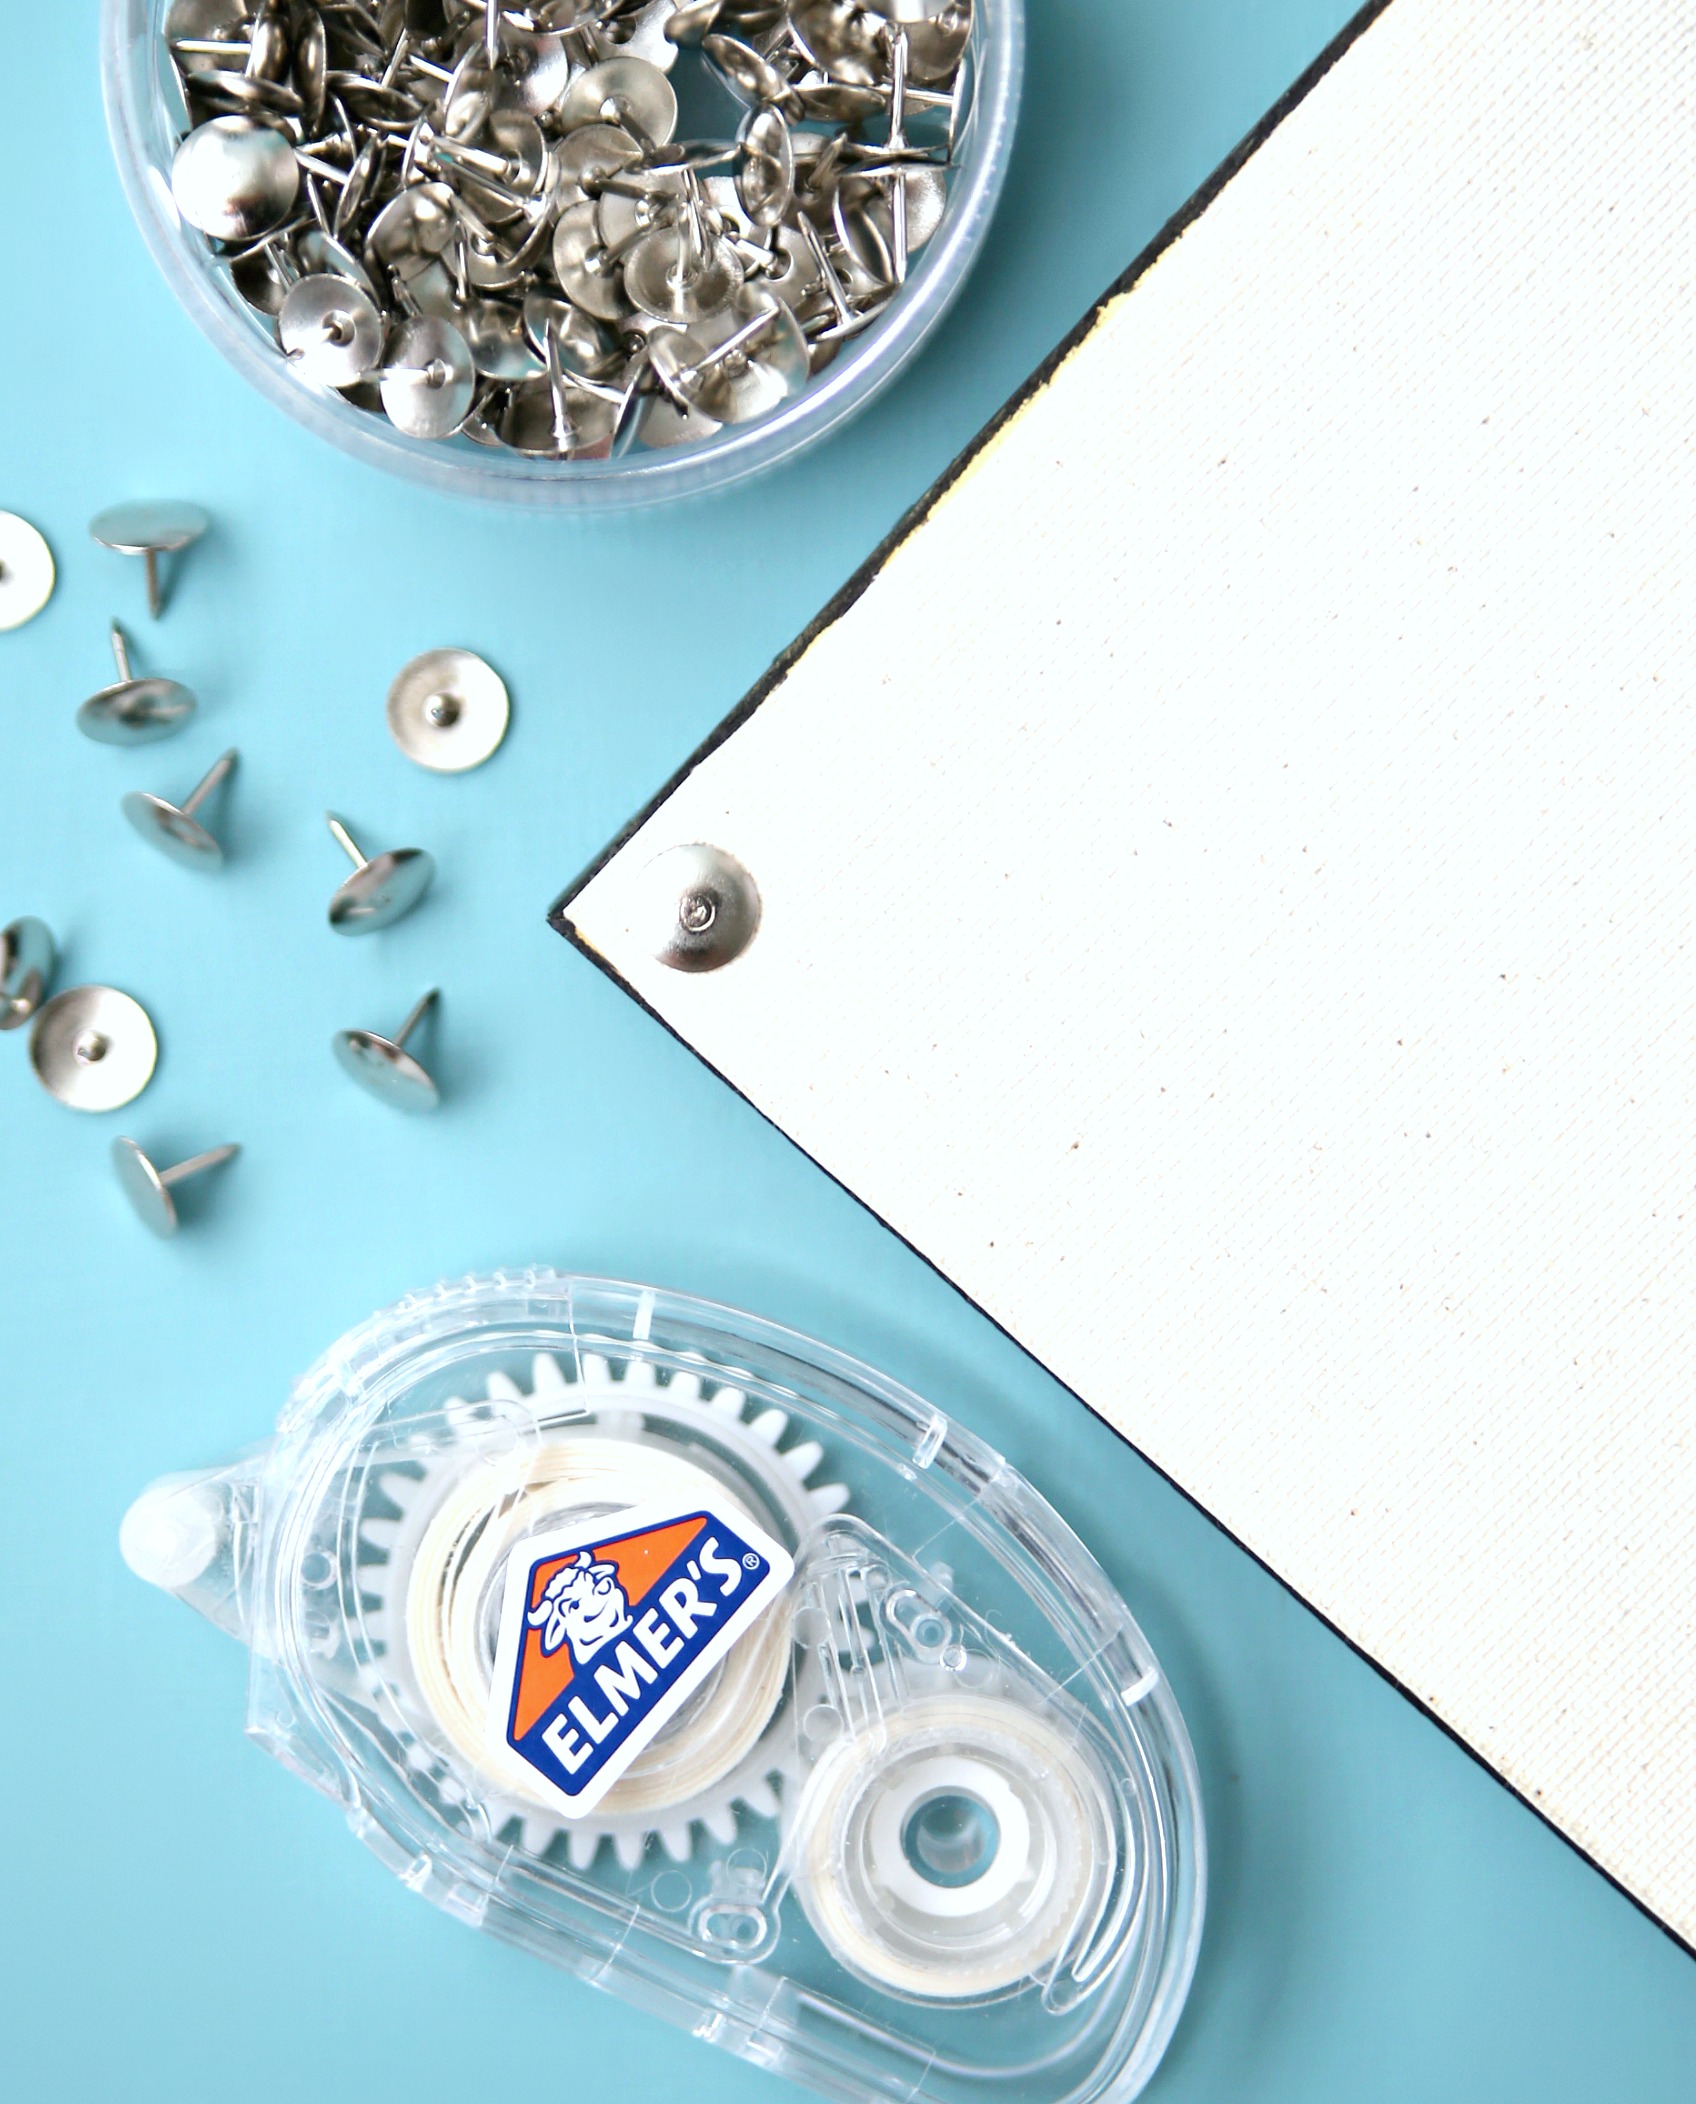
Use the tape runner to apply permanent tape around frame (or apply glue dots around frame). Center frame over image and press firmly. Flip frame and canvas over and use thumb tacks to attach canvas to wood frame.

Don’t you just love a fabulous dollar store craft project? I hope I’ve inspired you to make your own reverse canvas sign using inexpensive canvases from the dollar store.
Tips for Making a Reverse Canvas
- Removing the staples on the back of the wooden frame is optional. I didn’t worry about removing the staples because nobody is going to see that side but you can use pliers if you want to remove them from the back of the canvas.
- Feel free to stain the wood frame instead of painting it. You could also just use the natural wood frame.
- You can also paint the canvas black or a pretty color and use white iron on vinyl. How cute would that be?
- A staple gun or glue gun would also be a great option for attaching the canvas to the wood frame. It’s a little harder to center the image this way but it works.
Dollar Store Cricut Craft Projects

Looking for more fun Dollar Store Craft projects you can make with your Cricut? I think you’ll love these:
- Reverse Canvas from Happy Go Lucky
- Dollar Store Fall Sign from Hello Creative Family
- Yoda Night Light from Artsy Fartsy Mama
- Before/After School Mug and Wine Glass from Happiness is Homemade
- Infusible Ink Placemat from Crafting in the Rain
- Skeleton Hand Oven Mitt from Everyday Party Magazine
- Painted Acrylic Sign from The Country Chic Cottage
- Penmanship Tracing Mats from That’s What Che Said
- Potholder Baking Mix Gift Set from Brooklyn Berry Designs
- Gaming Organization Bins from See Lindsay
- Hanging Mask Organizer from Mad in Crafts
Eat Sleep Game Repeat SVG Cut Files

To download this freebie, just add your name and email in the form below and this FREE cut file will be delivered right to your inbox. Then, open your email and save the SVG file to your computer. It’s that easy!

More Fun Cricut Projects
[ess_grid alias=”Cricut Projects”]