This post and its photos may contain affiliate links. As an Amazon associate I earn from qualifying purchases. If you make a purchase through these links, I may receive a small commission at no extra cost to you.
This tutorial and the photos within it may contain Amazon or other affiliate links. If you purchase something through the link, I may receive a small commission at no extra charge to you.
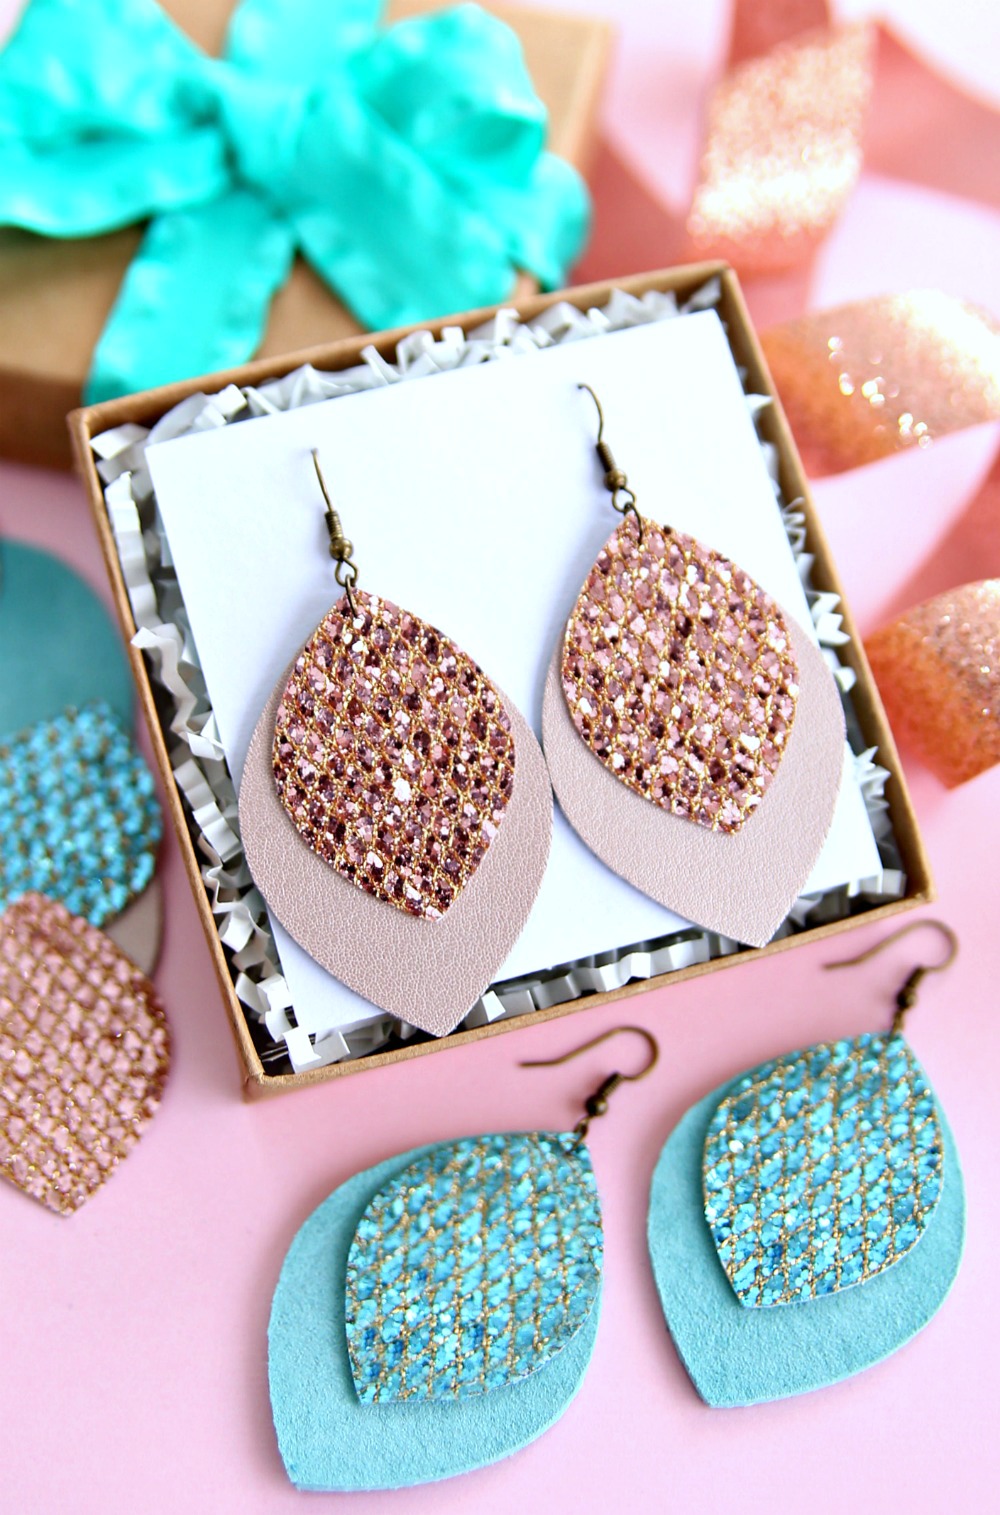
Learn how to make Glitter Leather Earrings in less than 15 minutes with this easy tutorial.
I’ve been wanting to make leather earrings with my Cricut since I first got my magical cutting machine 3 years ago and I just never got around to doing it. I’m not really sure why I’ve been putting this project off for so long because this has to be the easiest DIY jewelry project I’ve ever completed, And, I LOVE the way these earrings turned out.
I was originally just going to make plain leather earrings but then I found this awesome glitter leather at Hobby Lobby and new that I needed to add a little glam to my leather earrings. We all know that glitter makes everything better!
Supplies needed to make Glitter Leather Earrings
- Cricut Explore Air 2 or Cricut Maker
- Fabric Cutting Mat
- Deep-Point Blade
- Brayer
- Faux Leather
- Glitter Faux Leather
- Jump Rings
- Earring Hooks
- Jewelry Pliers
- Cardstock (for earring cards)
- Large Needle or Leather Punch
How to Make Glitter Leather Earrings
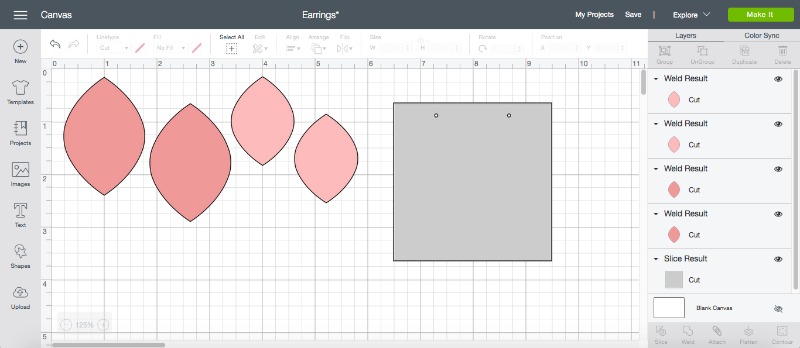
First, open this project in Design Space. You’ll see the two different sizes and the earring card design if you want to make these for gifts.
Add leather to the cutting mat and use the brayer to smooth out the material. Turn the knob of your Cricut Explore Air 2 to CUSTOM. Load the mat into the machine and click MAKE IT and CONTINUE.
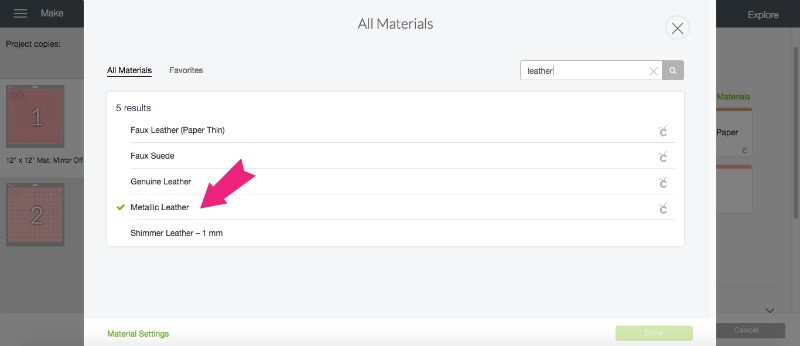
To SET MATERIAL, click BROWSE ALL MATERIALS and type LEATHER in search box. I selected METALLIC LEATHER for this project. I think you could also select shimmer leather.
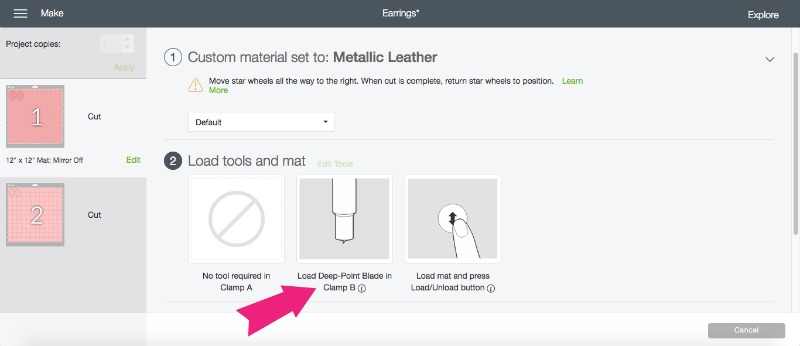
Add Deep-Point Blade to Cricut and you’re ready to let your Cricut work it’s magic.
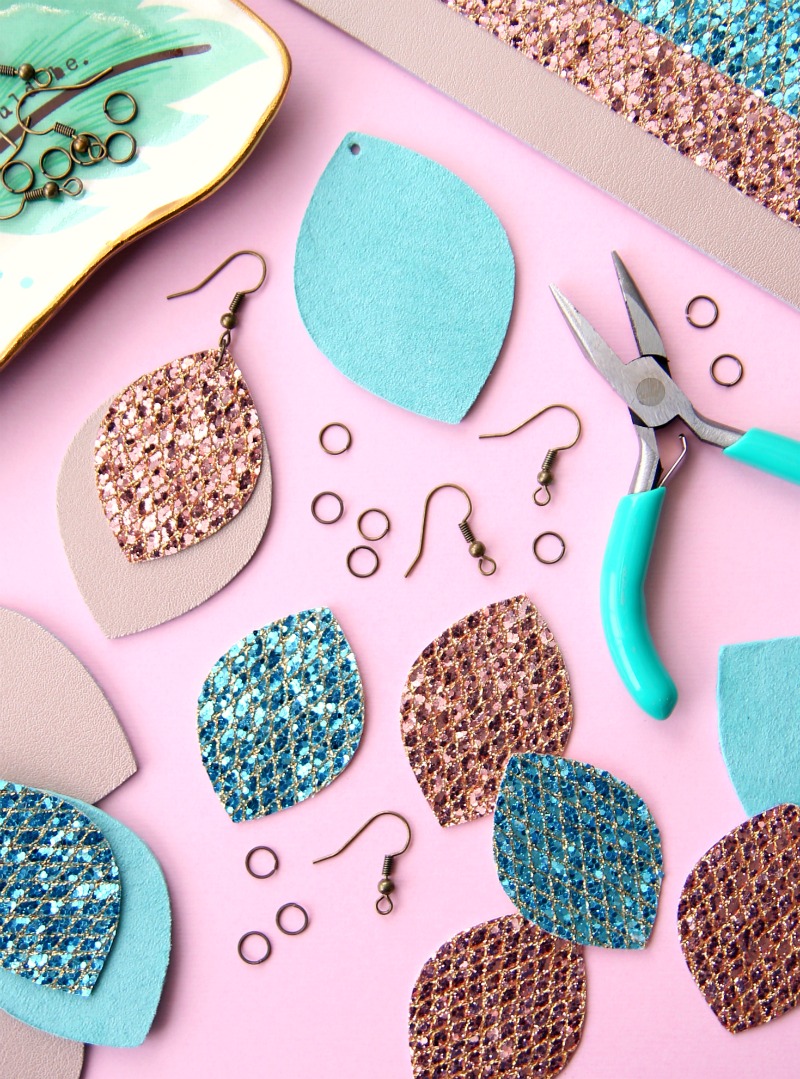
Now it’s time to assemble our earrings. First, use the needle or leather punch to punch holes at the top of each leather earring. Use the jewelry pliers to open a jump ring. Add leather pieces and earring hoop to jump ring. Close jump ring with pliers.
And, that’s it! Did you know it was this easy to make your own leather earrings?
I’m telling you – this is the easiest jewelry project ever. I’m also fairly certain that you could make these leather earrings without a Cricut but the Cricut definitely makes it easier and faster.
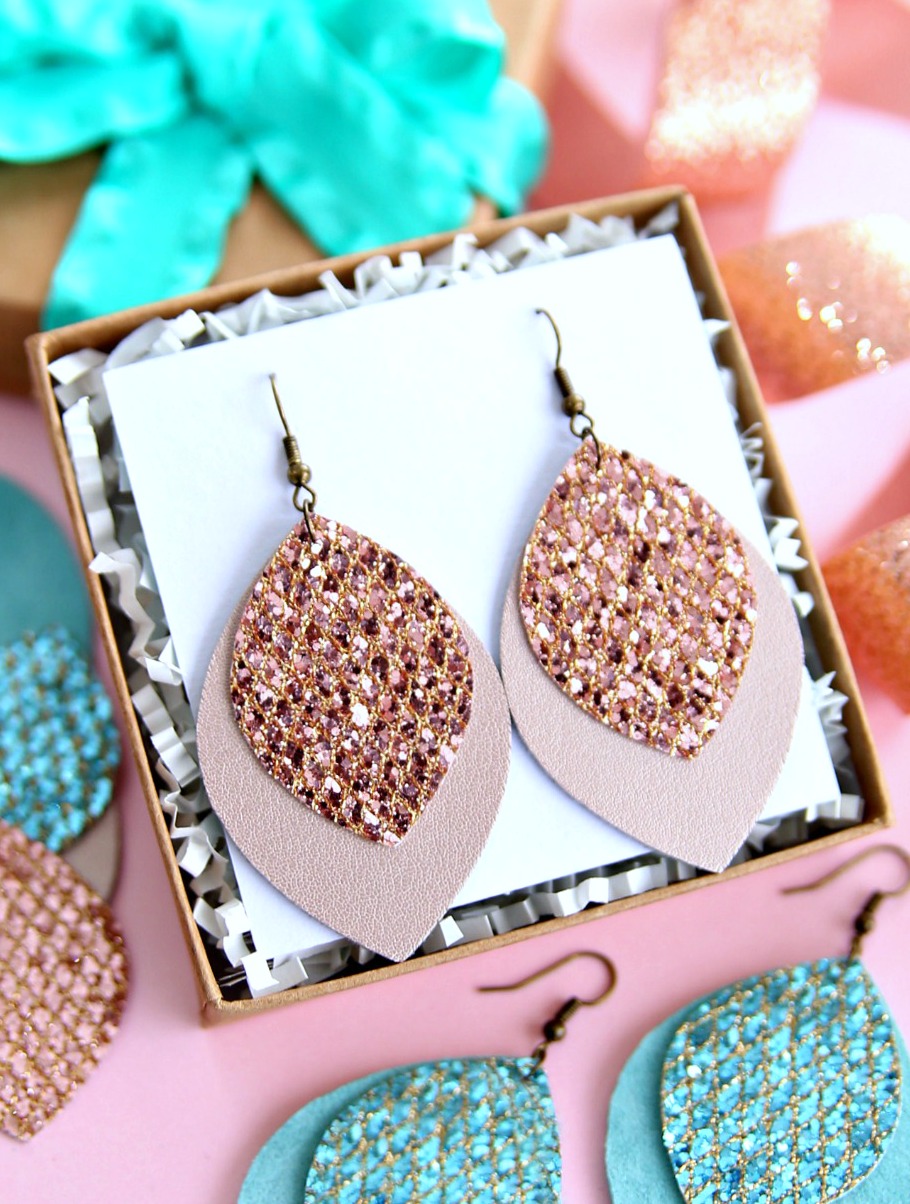
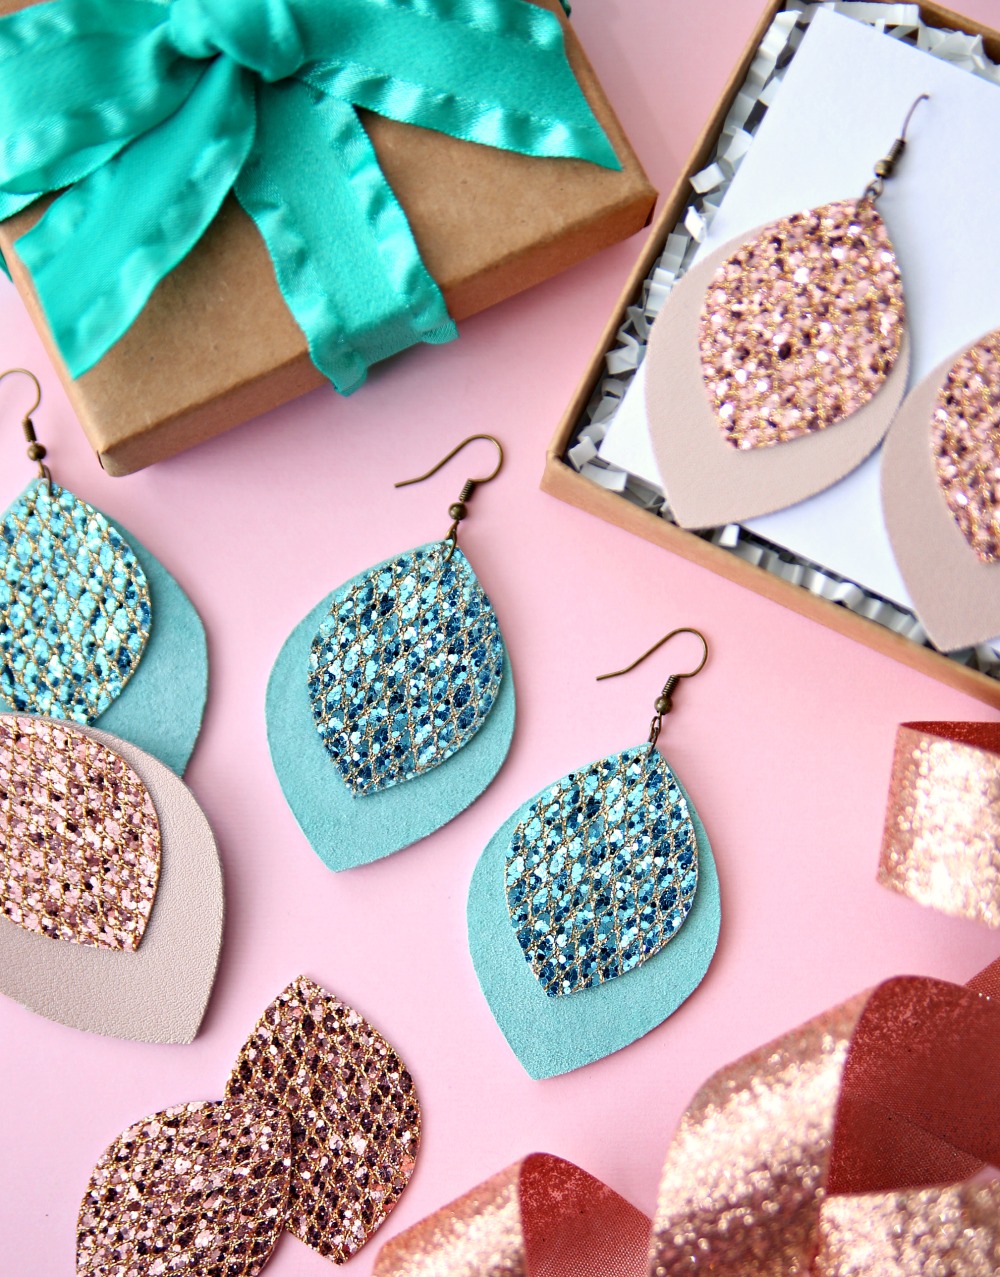
With the holidays right around the corner, this might also be the best gift idea for all your favorite people. Because, like I said above everyone needs a little glitter in their life and earrings are the perfect way to add glam to any outfit.
Looking for more awesome glitter projects that you can make in 15 minutes or less? Click the image below for a fabulous collection of Craft Lightning Glitter Craft Projects.

Looking for more easy projects to make with your Cricut?
I would LOVE to make something like these earrings. What size jump rings and earring hook would you recommend for them?
How do I find the design in Design Space? When I click it opens a blank canvas. Cricut newbie here!
What am I doing wrong. I have taped down my faux leather and when it goes to cut the second cut it moves the cut pieces and then it gets all messed up.
I clicked to get the project to put into design space, but it just has me download the cricut design space…not the design or project! Just as an FYI..because its kind of annoying!
I did however decide to make earrings because of this blog though!
Still need help making glitter earrings from my cricut explorer air 2