This post and its photos may contain affiliate links. As an Amazon associate I earn from qualifying purchases. If you make a purchase through these links, I may receive a small commission at no extra cost to you.
Simple ways to make your own ear savers to help protect your ears while wearing your face mask.
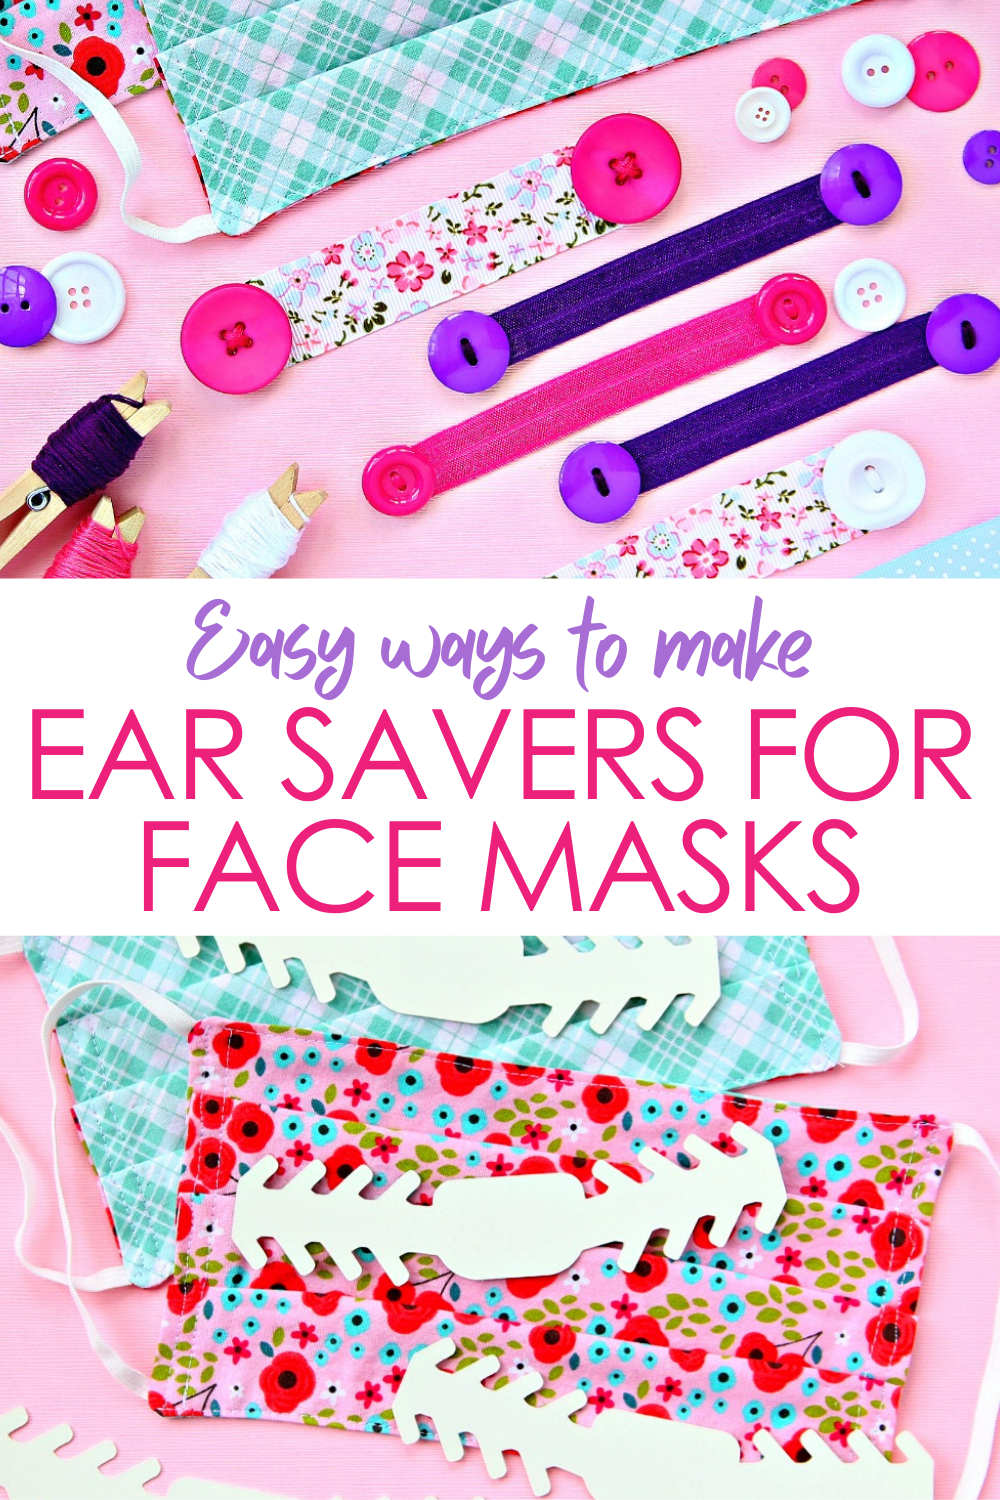
Did you know that you can make wearing a face mask more comfortable by pairing them with ear savers?
I’m sharing easy ways to make ear savors for face masks. One will require a Cricut or Silhouette but the other are easy DIY projects that you can quickly do yourself.

Ribbon Ear Savers
I first wanted to share an easy way to make ear savers that anyone can make. These Ribbon Ear Savers are easy to make and the best thing about them is that you can easily find all the supplies. You probably even have most of the supplies in your craft stash.
If you know how to tie a knot, you can make ribbon ear savers. Just stitch buttons on each end of a piece of ribbon and you have a simple ear saver for your face mask.
Materials Needed to Make Elastic Ribbon Ear Savers:
- Grosgrain Ribbon
- Buttons
- Embroidery Thread
- Needle
- Glue Gun and Glue Sticks (optional)
How to Make Ribbon Ear Savers:
- Cut ribbon into 6 inch strips.
- Sew a button on each end of the ribbon.
- Use glue gun to attach ribbon ends to back of the ribbon and glue thread ends to the ribbon. This is optional. I just wanted to make sure everything was extra secure.
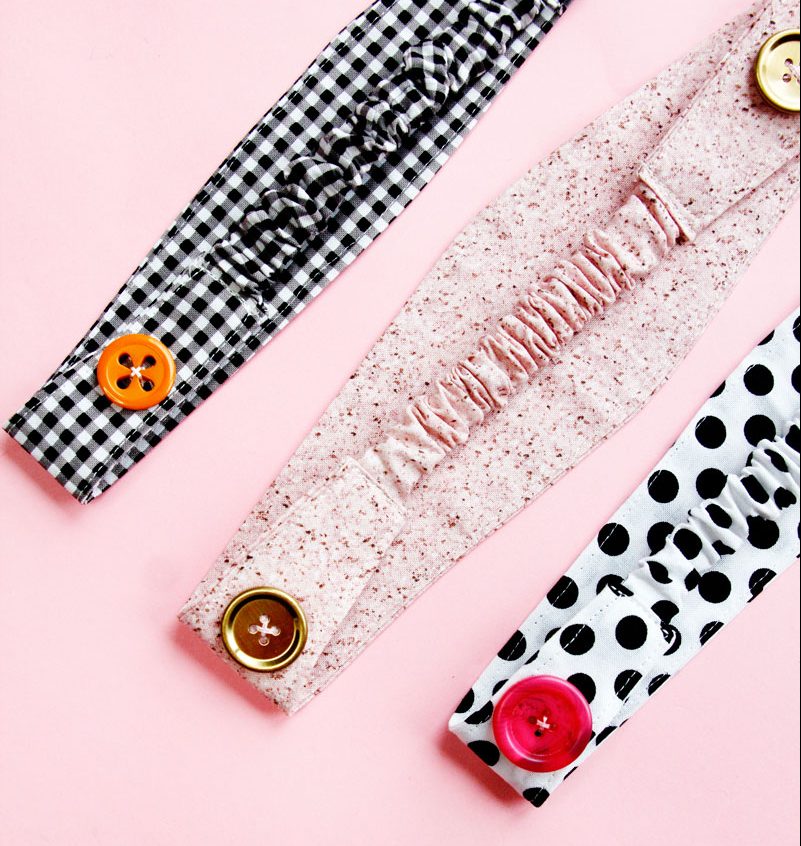
Elastic Ribbon Ear Savers
This is basically the same as the Ribbon Ear Savers but I used elastic ribbon that I had left over from these bookmarks that I made a few years ago. This is the same ribbon used to make hair ties and headbands. Follow the same directions above for these ear savers.
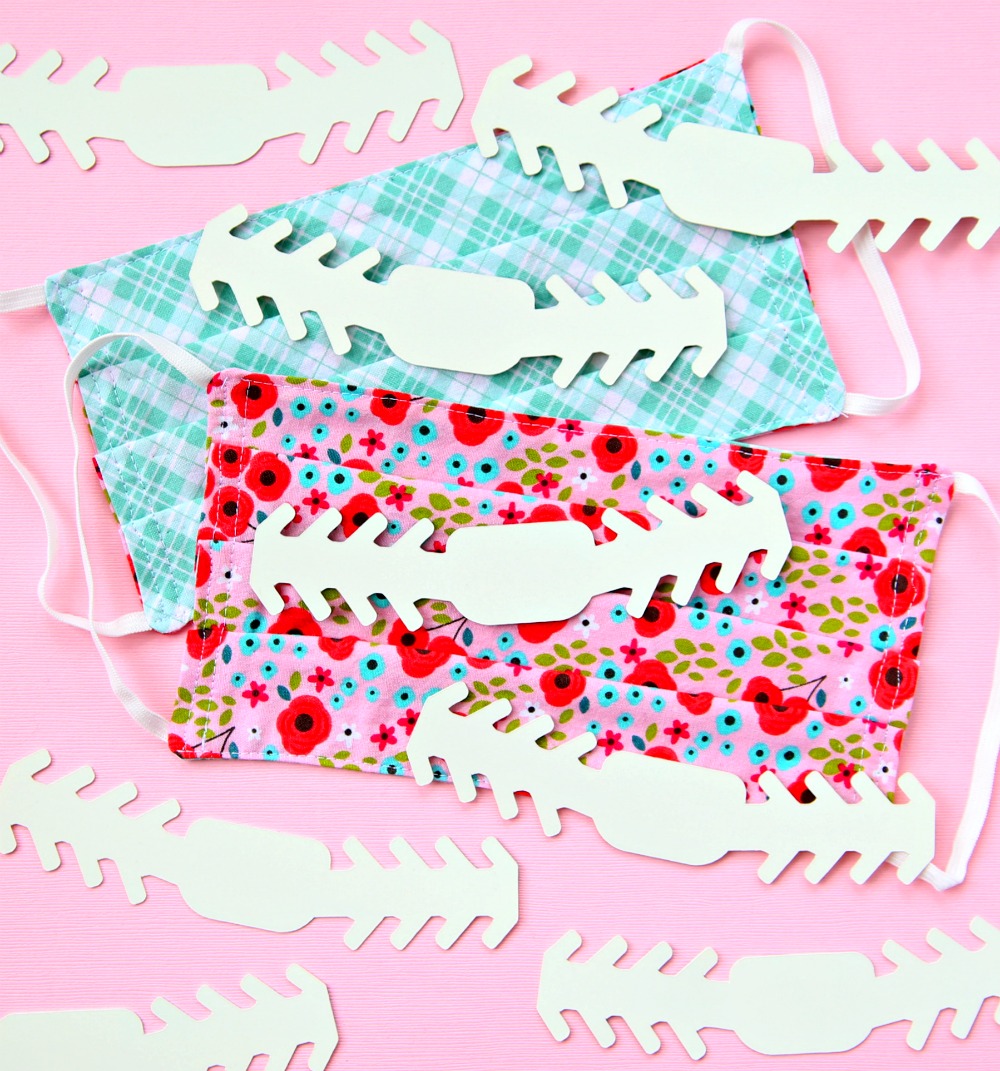
Plastic Ear Savers
If you have a Cricut, let your awesome cutting machine do all the work for you. After testing a few materials and SVG cut files, I’ve found that plastic placemats and plastic cutting mats from the dollar store work best for plastic ear savers. You can also use plastic dividers but that material is a little thinner.
Materials Needed to Make Plastic Ear Savers
- Cricut Explore Air 2 or Cricut Maker
- StrongGrip Mat
- Plastic Placemats and/or Cutting Mats
How to Make Ear Savers with Your Cricut
- Add placemat to cutting mat and load into your machine
- Download one of the free SVG cut files listed below and add to Design Space. I found that 6 inches in length was a good size for these ear savers.
- Duplicate the files to cut as many ear savers as you need. I was able to cut 14 ear savers at a time. You might need to move them around on the mat and arrange them to fit to get as many as possible on one mat.
- Set your machine dial to CUSTOM and select NATURAL WOOD VENEER.
- Now, just let your Cricut work it’s magic.
Free Ear Saver SVG Cut Files
More Ear Saver Ideas
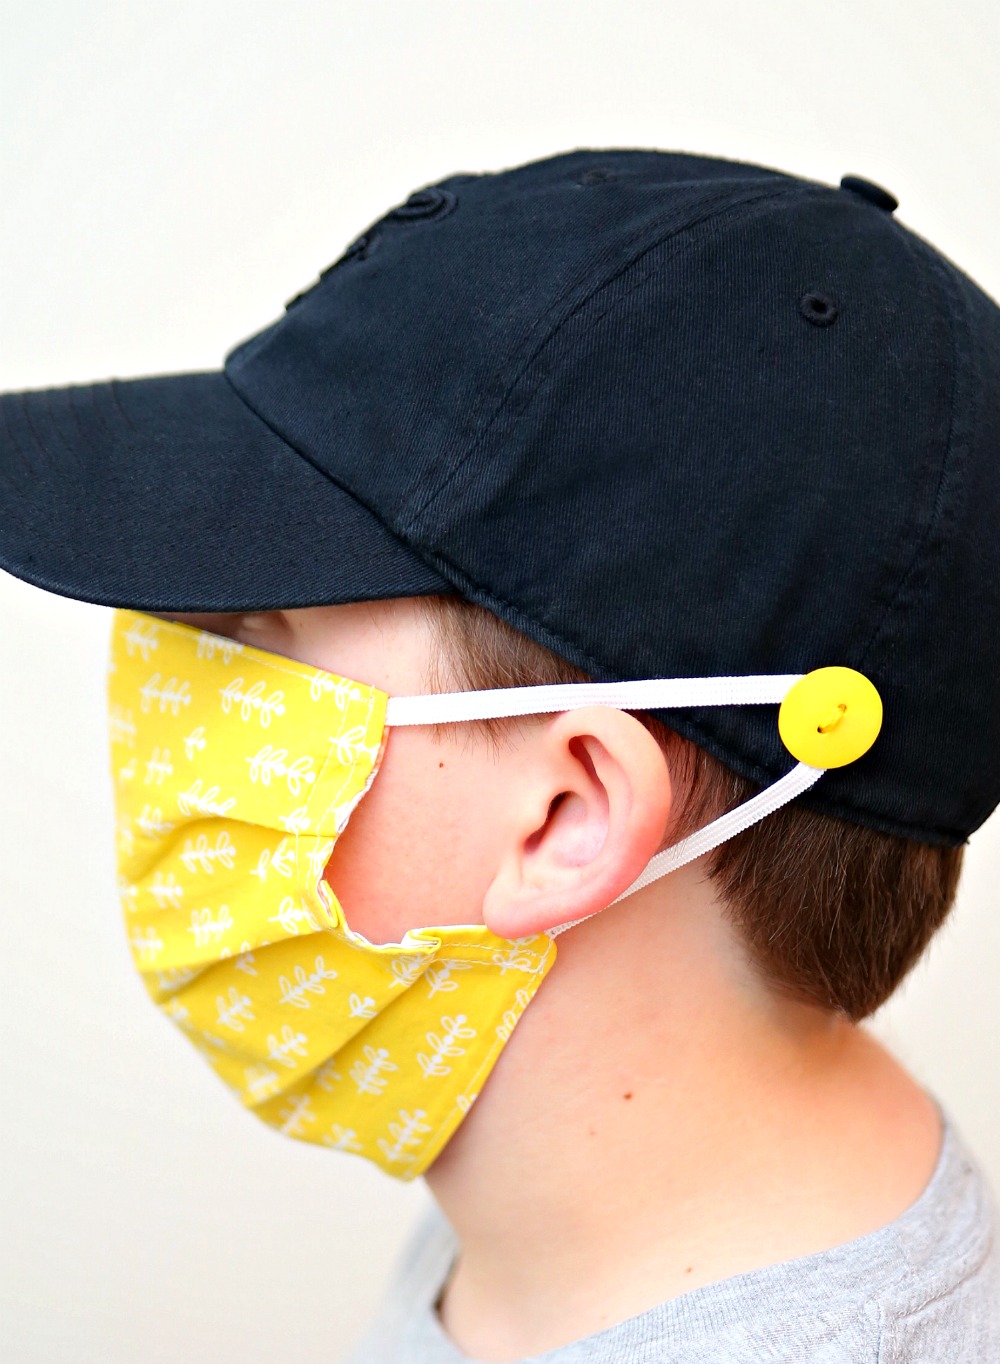
Sew a button to each side of a baseball hat. This is especially great for kids.
You can also do the same with headbands. See Kate Sew has a great tutorial for making headbands with buttons HERE.
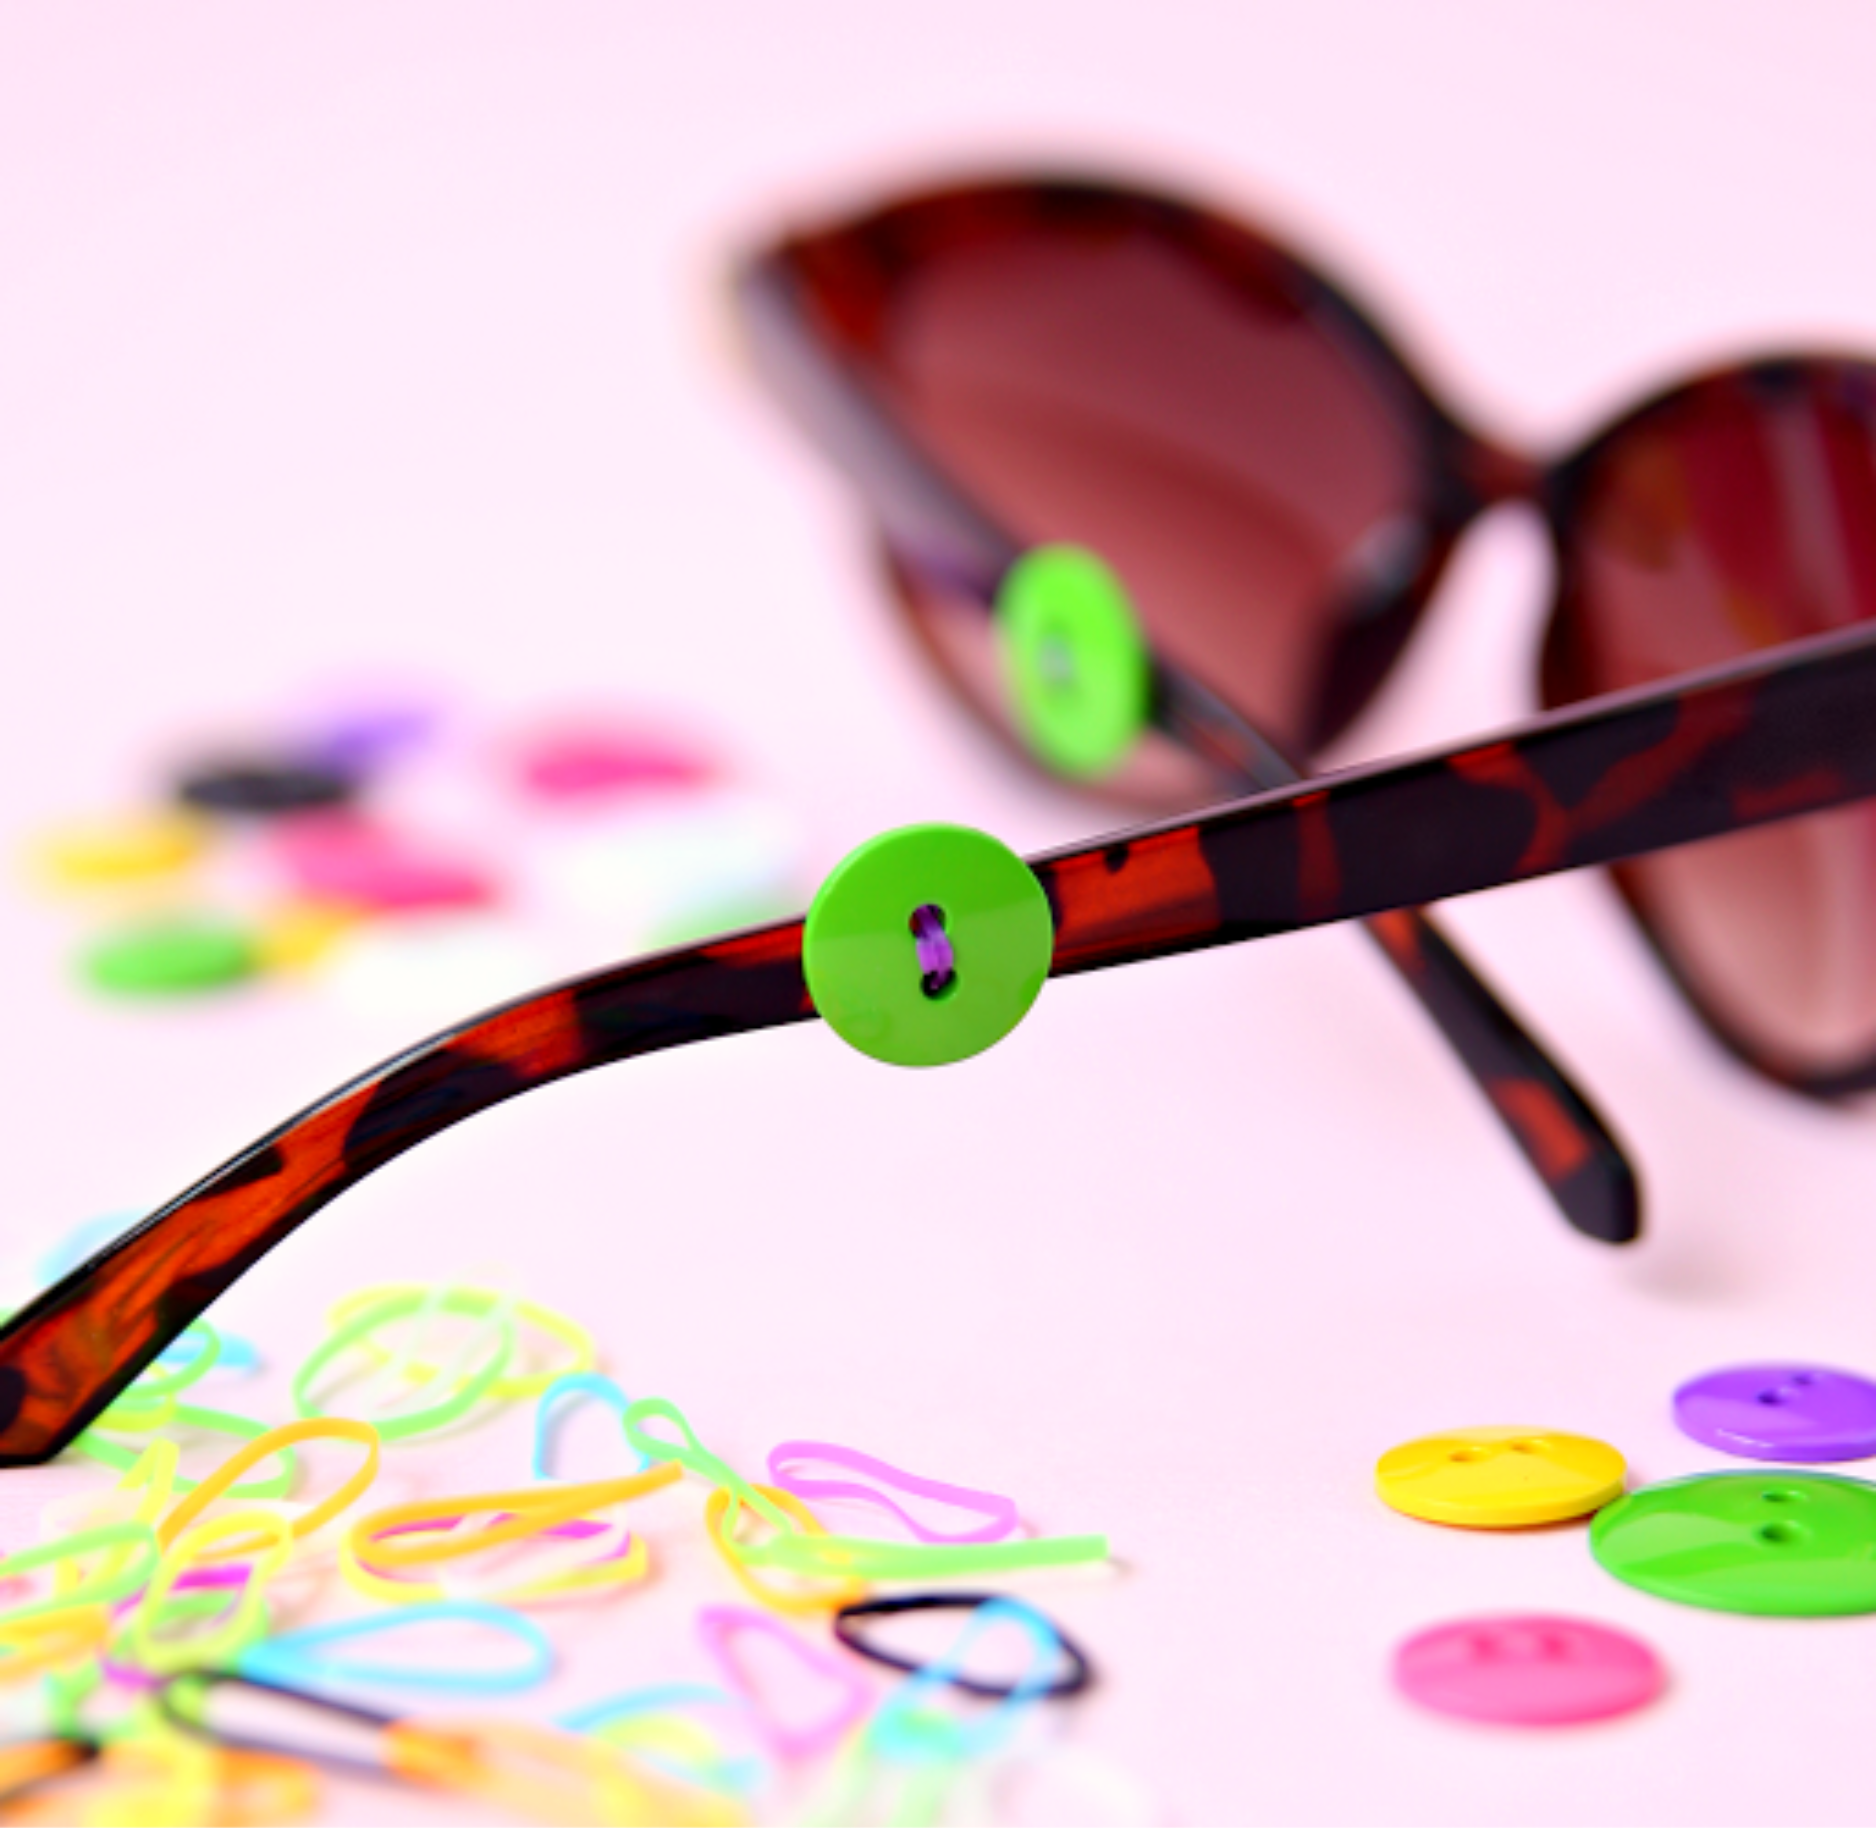
Use small rubber bands to attach buttons to glasses. I don’t wear glasses so I’m showing you with my sunglasses. Then just slide the button on the s to adjust wear your face mask needs to be for comfort. I found that it’s easier to have the buttons in front of your ears. It wasn’t comfortable to have the buttons behind my ears. I also had to tie my elastic to m
Have you made any ear savers? If so, what’s your favorite method to make your face mask more comfortable?