This post and its photos may contain affiliate links. As an Amazon associate I earn from qualifying purchases. If you make a purchase through these links, I may receive a small commission at no extra cost to you.
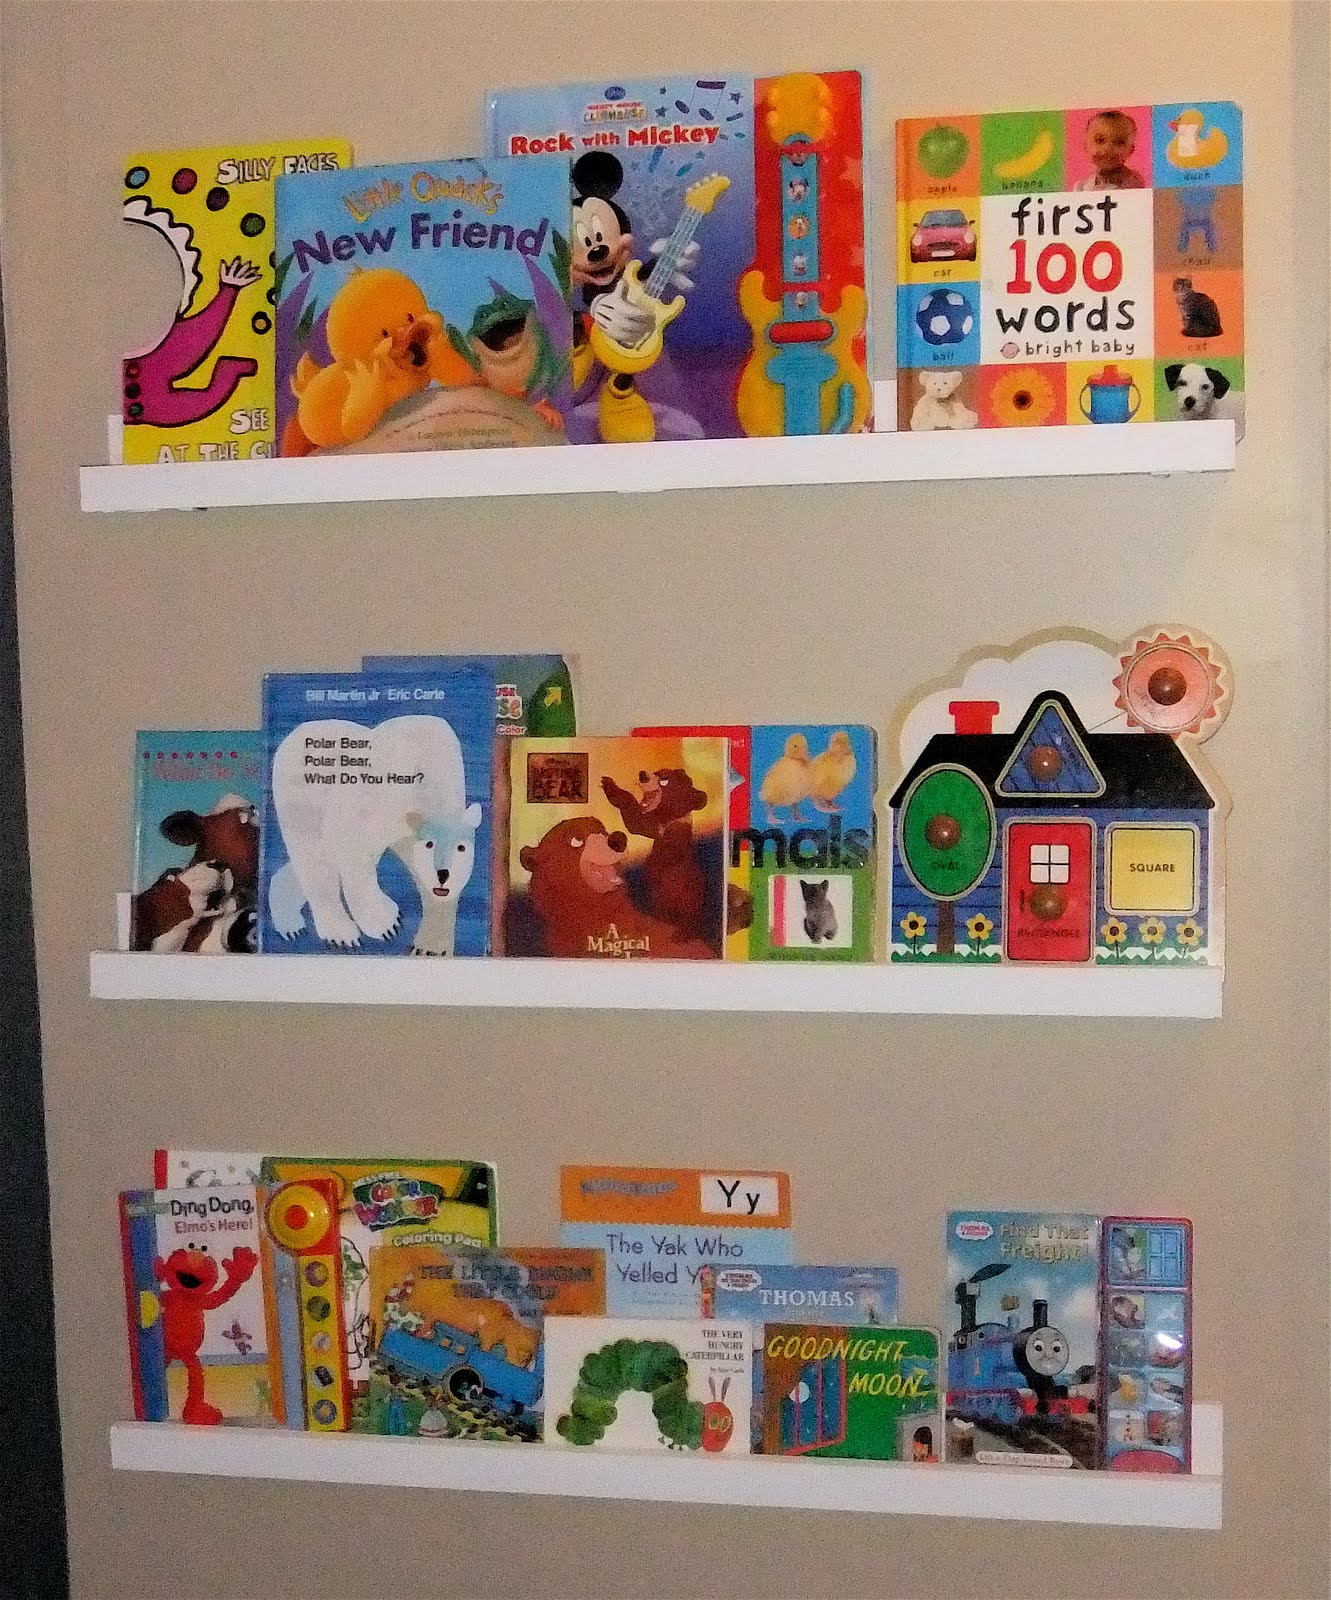
When I first saw these book ledges in The Land of Nod catalog I knew I wanted them for Connor’s playroom. I love the fact that you can see the front of the books instead of just the spines.
 | ||
| The Land of Nod’s Book Ledges – $20 Each |
 |
| The Book Ledges I Built for under $30 |
I was a little disappointed when I realized that they were out of stock so I knew I had to make them myself. And I’m so glad I did considering I was able to make three shelves for less than $30.
The first step was to measure the space. I decided I wanted mine to be 38 inches long. The best part of making them myself was the fact that I could customize the length.
I went to Home Depot and had my wood cut. This is what I got to make my three shelves:
- 6 – 1 x 3 @ 38 inches long
- 3 – 1 x 2 @ 38 inches long
Each shelf requires two 1 x 3’s and one 1 x 2 . I got the cheapest wood since I was planning on painting the shelves.
Now we don’t own any fancy tools or gadgets. I found a few tutorials online but they all required special drill bits and other items I didn’t have. To keep this easy and cheap, I knew I had to figure out a way to build the shelves with only my drill or screwdriver.
I found these brackets in one of the aisles at Home Depot and decided to use them to attach my pieces of wood together.
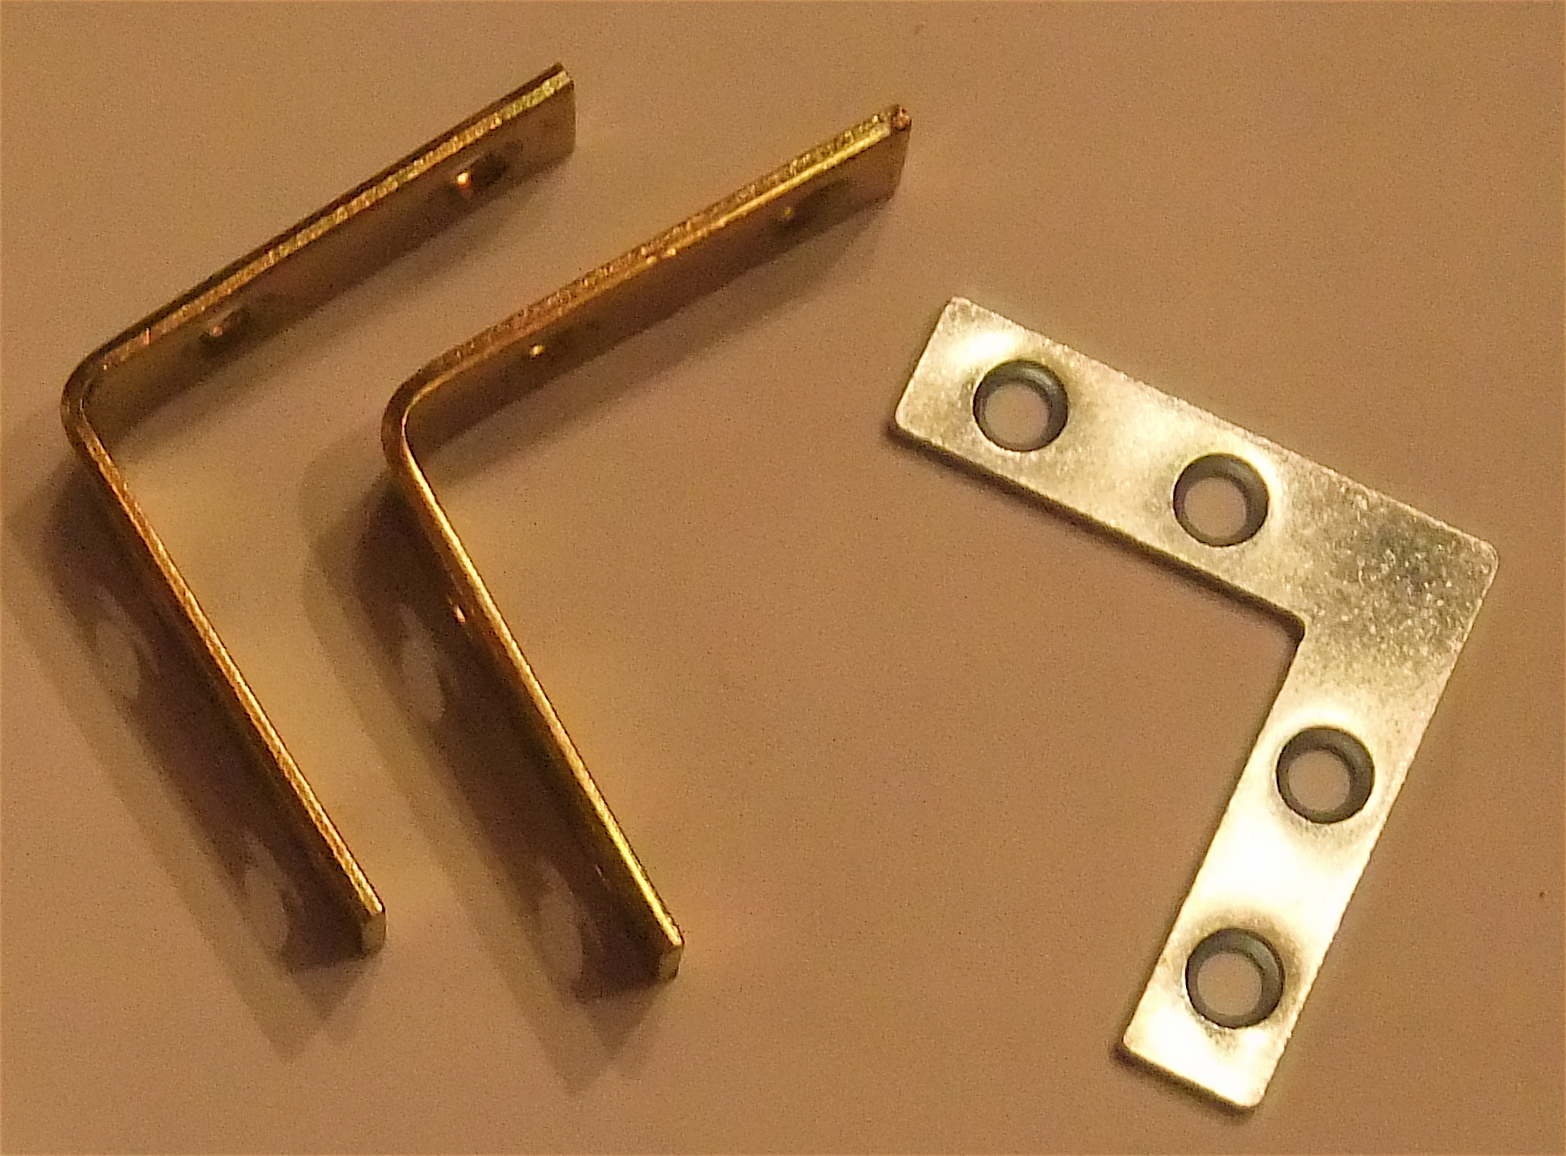
I bought three packs of the corner brackets and three packs of the flat brackets – one pack for each shelf. They come 4 in a pack.

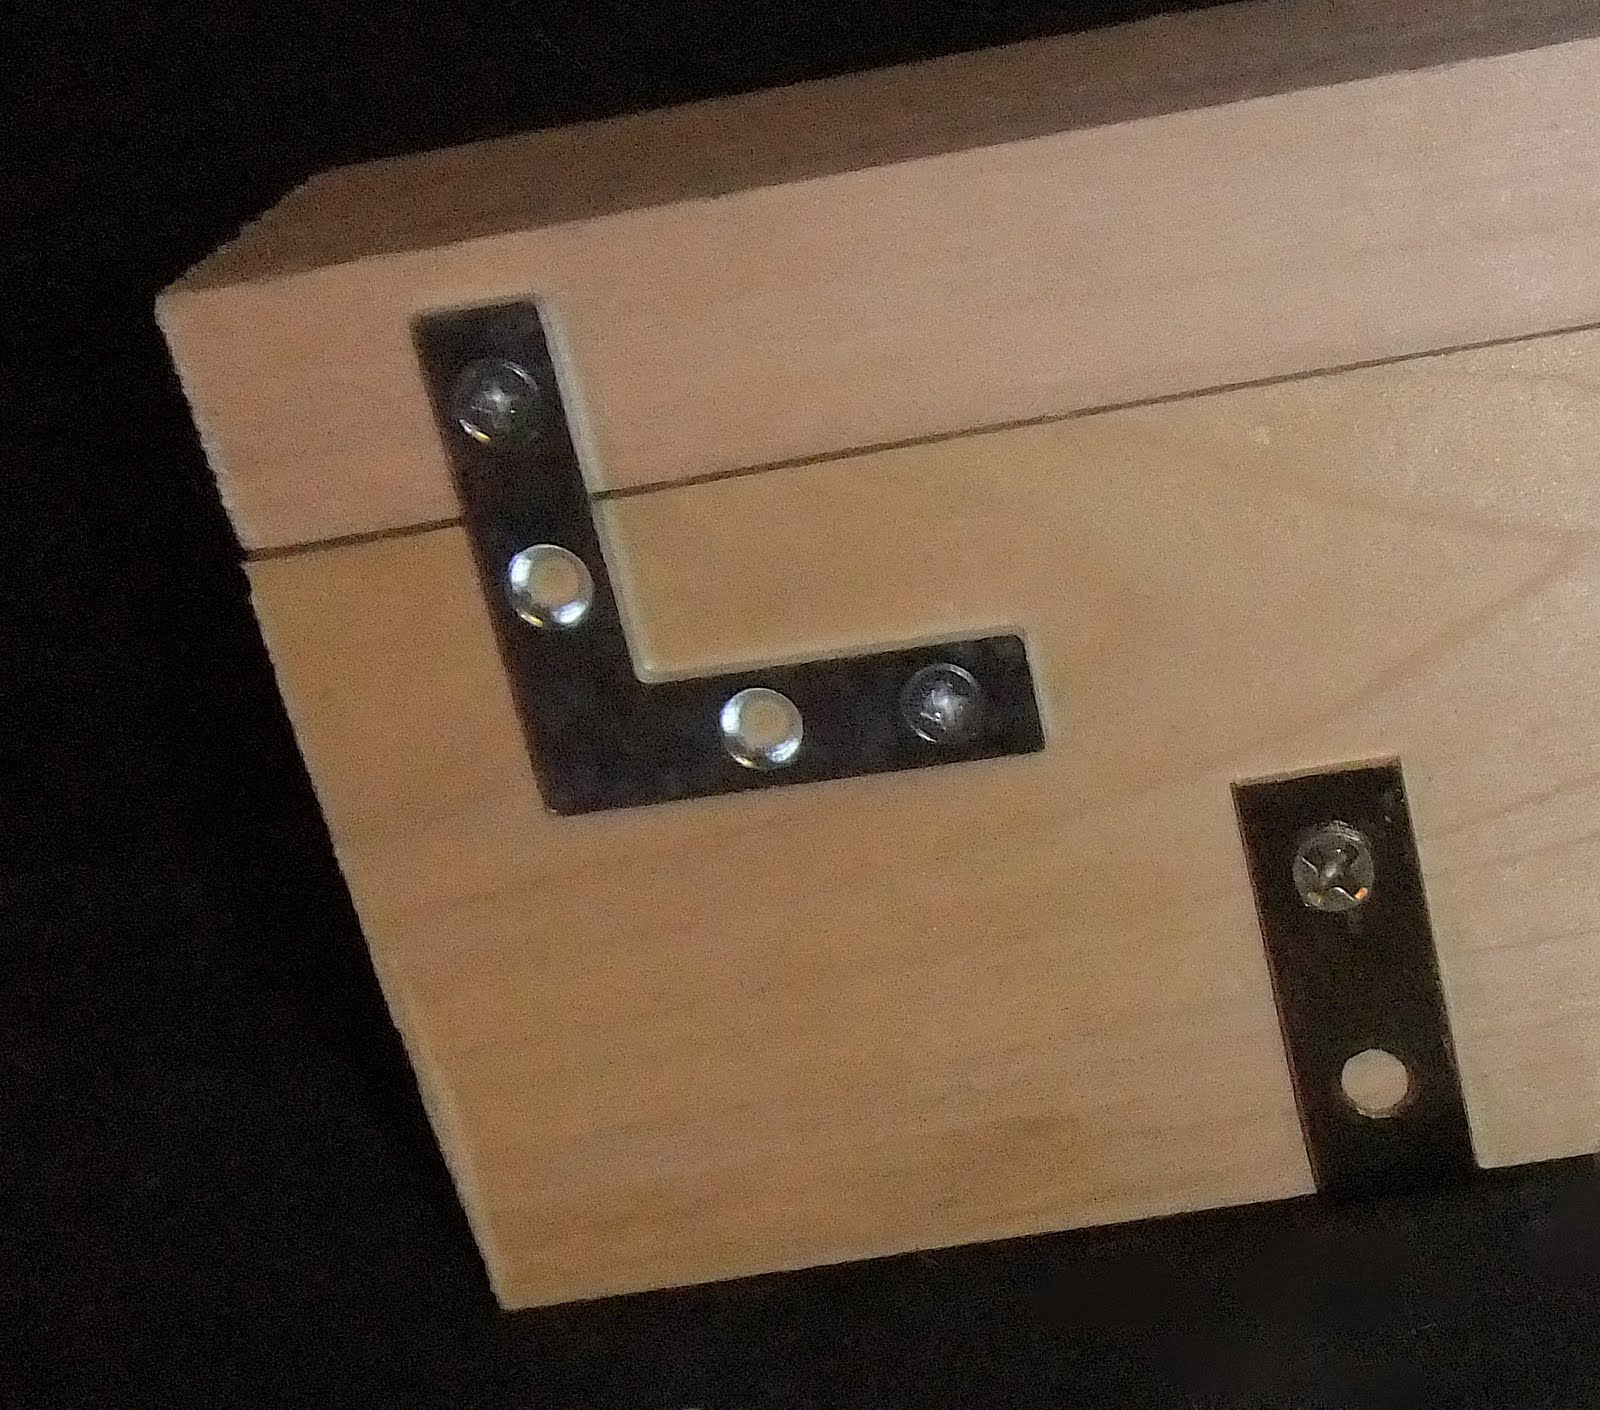
Then I put the 1 x 2 in the front. I attached the front piece of wood using the flat brackets. These are screwed in the bottom of the shelf so you won’t see these either. I screwed the flat brackets in two places.
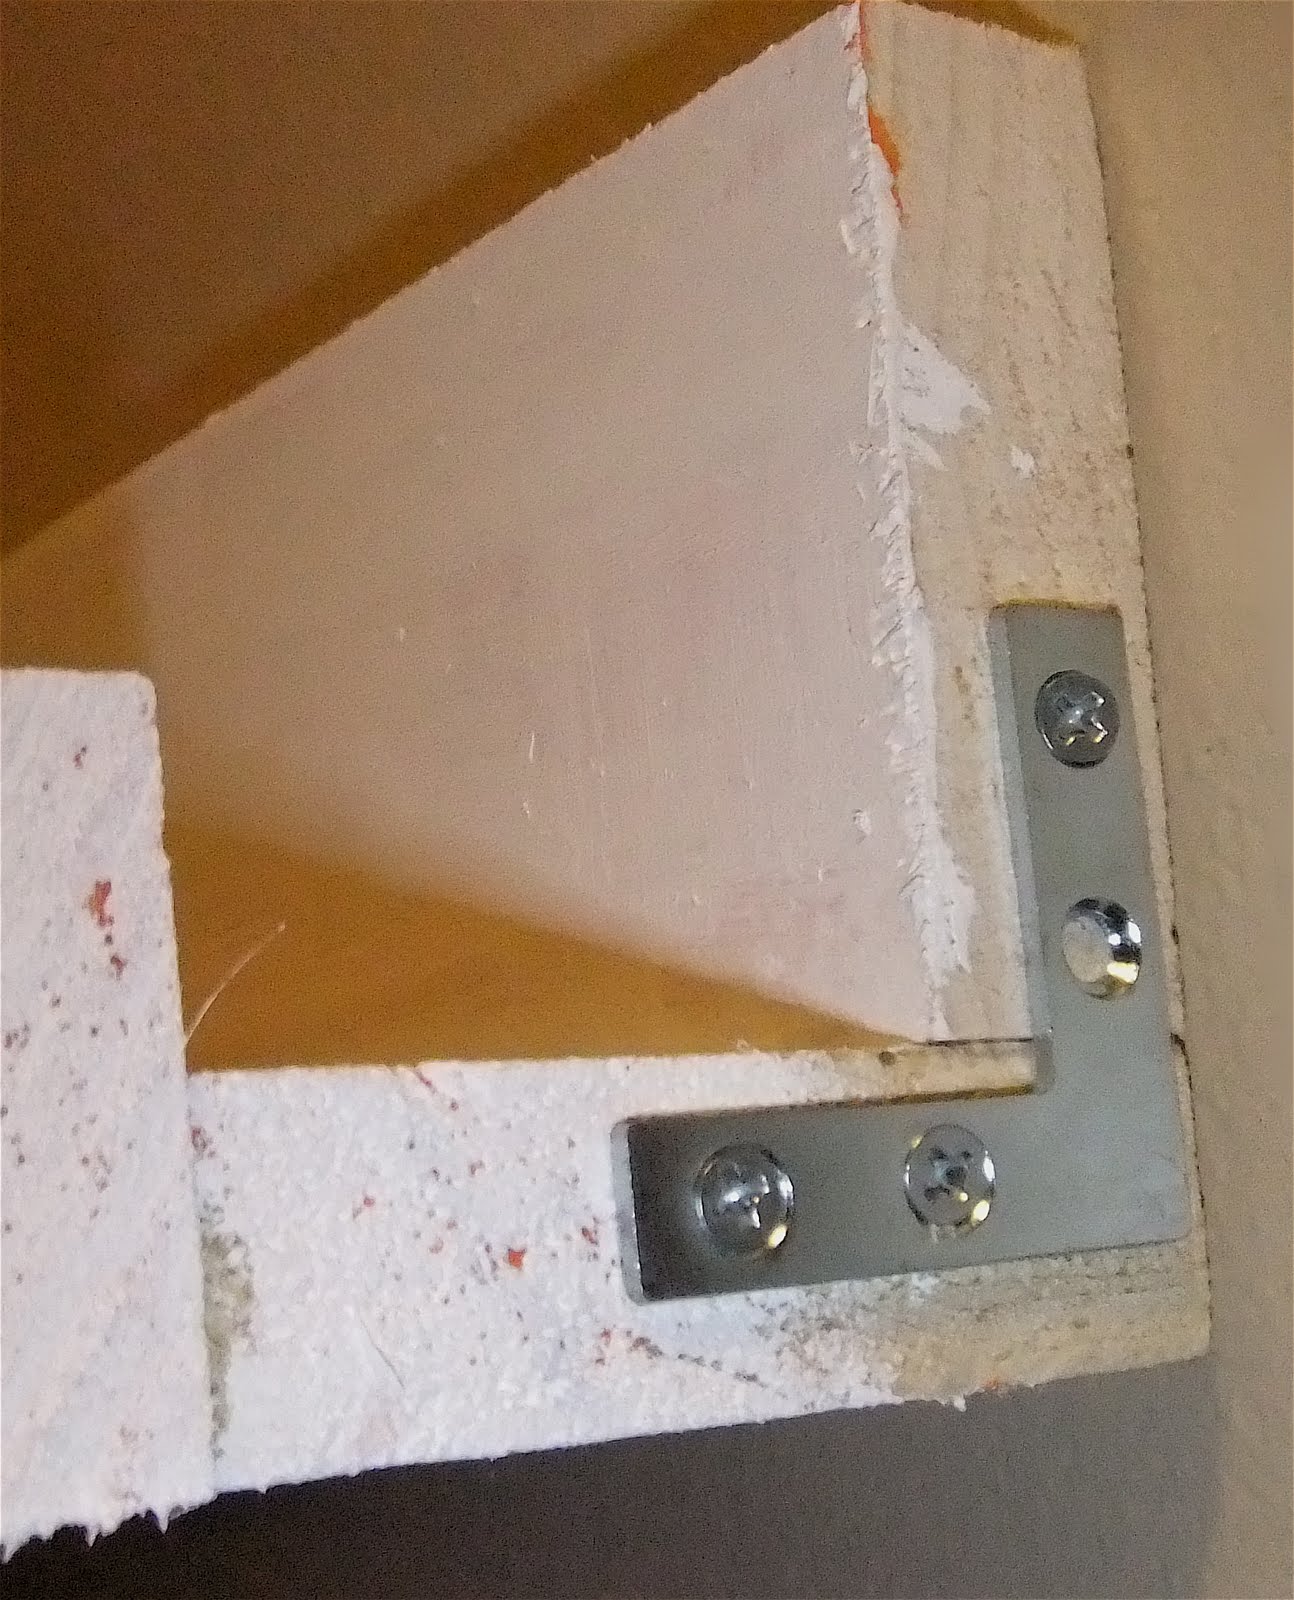
I just hung the shelves using my drill and painted them white.
I’m actually very pleased with the end result. They look very nice with all the books on them. The best part has been watching Connor just go up and start reading his books.
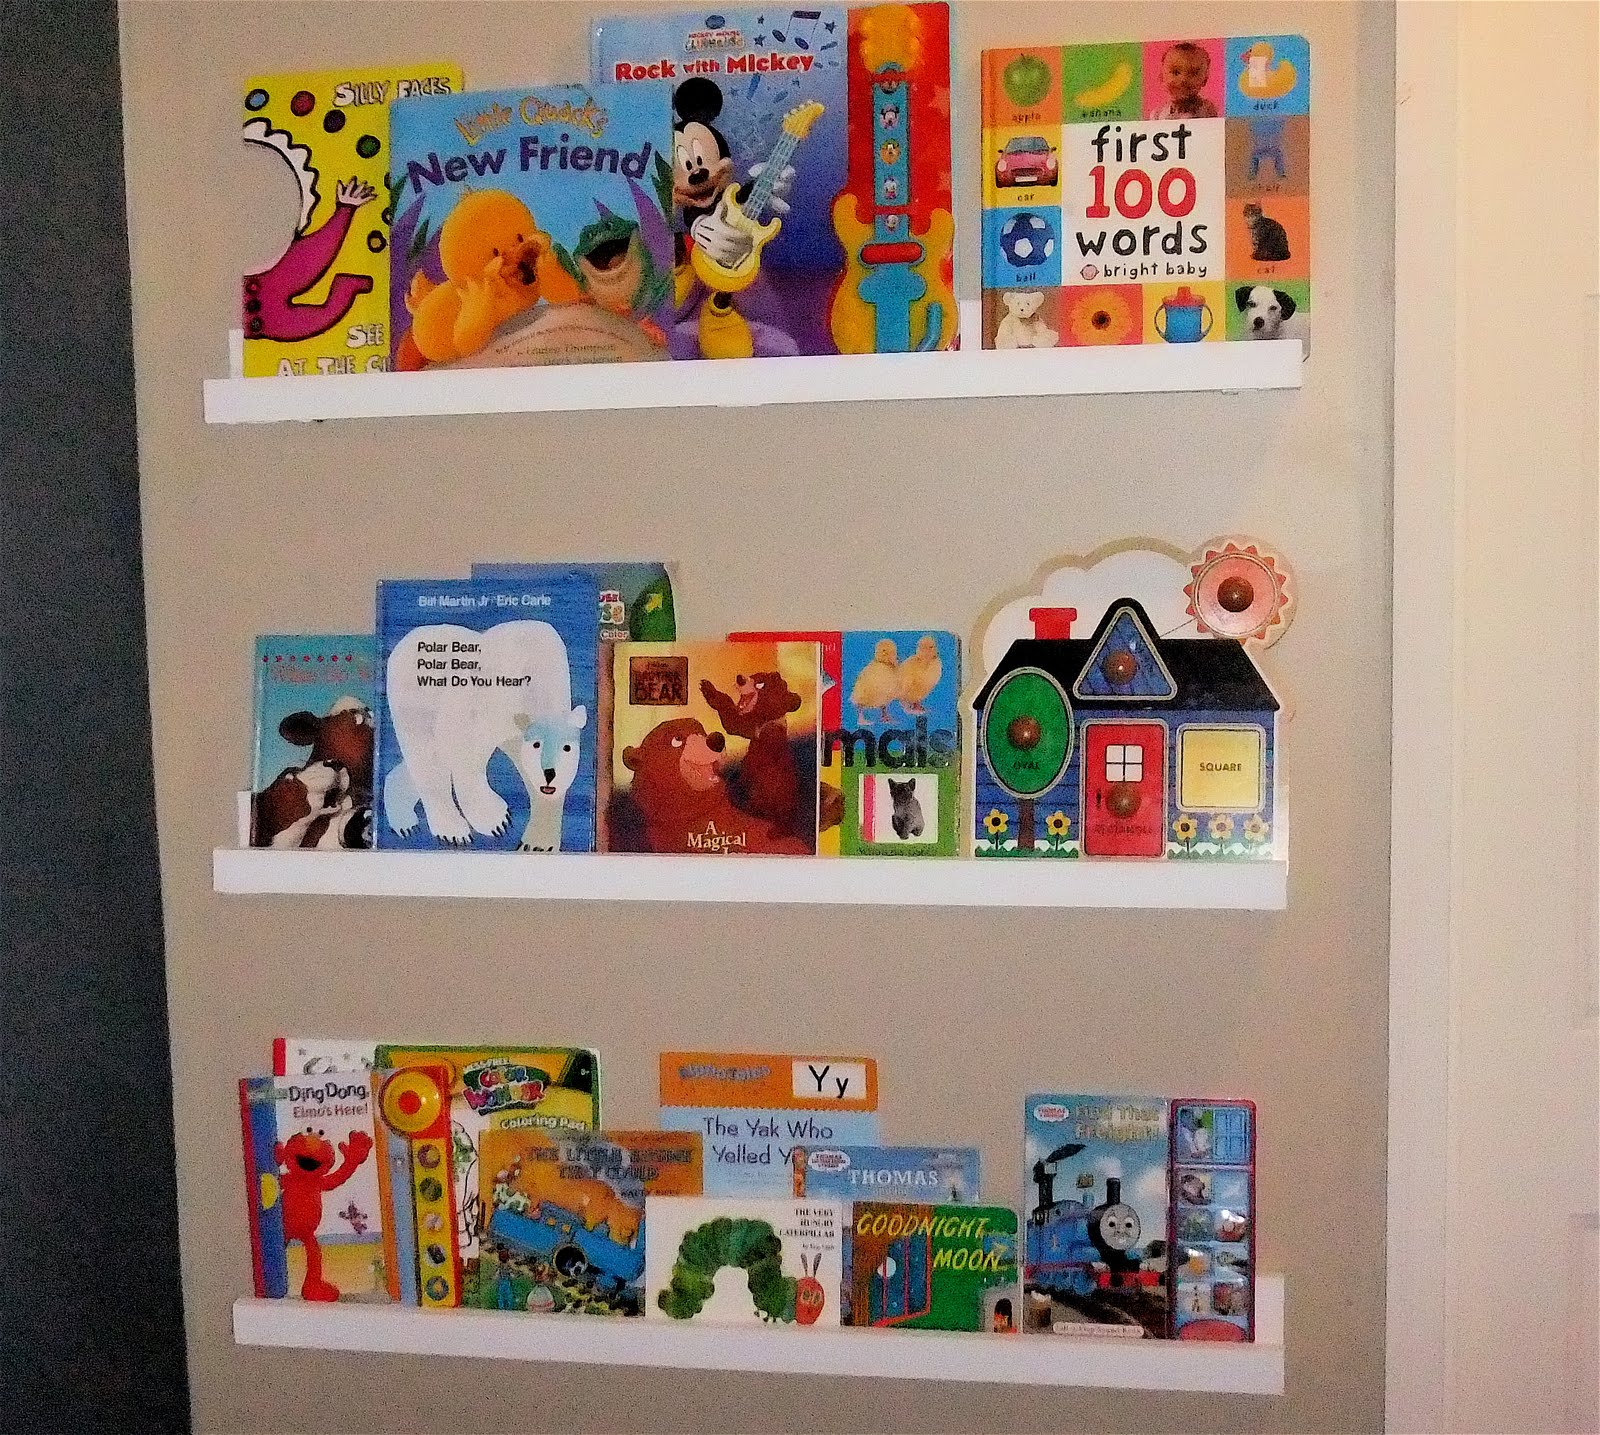
I also love that the books look like art work on the wall.
So with a few pieces of wood, a drill and some brackets you can build your own book ledges also!! And instead of paying $20 for each shelf, you can do it for less than $30.
That means it is time to order some fun, new books for Connor.
I hope this inspires you to build your own book ledges. Have a great week!!
Looks fantastic. The white ledges look brilliant against the bright colours in the books. Well done. 🙂
wow. that’s amazing! they look so professional. well done!
Great job! Makes me think I can do something like this!
Sooo love… I always love shelves and your tutorial made it so simple. So bad I can’t find such L bracket here…I would have copy your shelf dozens time.
Brilliant! I’ll be bookmarking this to make in the very near future!
Thanks for linking up with Super Stalker Sunday hop. There are so many wonderful blogs participating, I hope you’ve found a few that you enjoy. Be sure to join us again next week!
Best,
Emily from Nap Time Is My Time
Those are great!! They really look fabulous!! I want some NOW. 🙂
Thanks for linking up on my Super STALKER Sunday! I can’t believe the response we have gotten again this week! 😀 If I wasn’t already stalking you, I am now!
I hope you won’t be a stranger and come back next week, or even just mid week and say hello! : ) I post lots of other great things like recipes, tackles, and rambles (oh my!).
Have you checked out my FANTASTIC Blog Hop Directory? It has at least 20 blog hops listed for each day of the week. There has to be something there to suit your fancy too. ; )
So cute!
Saw you on Sugarbee Crafts link up party. 🙂
Following you now. 🙂
Ginger
gingersnapcrafts.blogspot.com
Wow! You did a great job! I’m not so handy when it comes to things like that so way to go to you!!
I’m following from the Super Stalker Sunday Hop! Thanks so much for linking up with us! I hope you can come join us again next weekend!! 🙂
P.S. I linked up my current giveaway on your list (Kung Fu Panda Movie/Cereal Prize Pack) Thanks so much for hosting that linky!
Have a great week,
Kortney
http://www.kortneyskrazylife.com
Wow you did a great job on these! Happily following from WW. I’d love if you’d consider following me back. Thanks, Malia
http://www.yesterdayontuesday.com
Love it! I want to build something like this to display all my mini albums. Thanks for sharing 🙂
Great idea! I have very few tools as well so this is perfect. Thanks for sharing!
Hi! Following you from the Welcome Wednesday hop! Hope you visit My Cajun blog and return the follow!
– Jessica @ http://cajunlicious.com
That is an amazing project. Great job and thank you for sharing. I’m a new follower. I found you on the list at http://takeitfrom-me.blogspot.com
I’m new at the blogging thing and trying to discover new blogs and have others follow me too. HELP! I think my brain is exploding with information. Lol!
These look great, and the blog looks great.
These are awesome! I love the way they show off the books like they’re art. Really cool.
I’m glad I found ya through the Thursday hop. Hope you’ll come visit me and follow me back at:
http://mommychosis@blogspot.com
Happy Thursday,
Kim
Great job! I may have to do this for my sons’ room!
I’m your newest follower via the SSS Hop! Have a great week!
I really love this idea! This would be great for people who have a tons of books and like to rotate them through. Kids might like to “shop” for books to read – so that could be an idea to get a young one interested in reading.
I’m here from Relax and Surf and a new follower. I hope you can visit me sometime soon and perhaps return the follow 🙂 Have a great Sunday!
I love this idea and have made several in the past for my stamp collections. If you use decorative moulding for the front edge they look beautiful in a family room holding picture frames of family or artwork. And you can change it up anytime! Great for holiday decorating too!
We have been planning on making some for our new baby’s nursery and will be using your site for instructions. Thanks for the how-tos! Yours came out great. I’ll be sure to link back to your site when we finally show them off on our blog =)
Hi, Kara. I am obsessed with these book ledges and and definitely going to make them for my son’s room. How far apart did you hang the ledges? Thanks!! Keely