DIY Drawer Dividers
This post and its photos may contain affiliate links. As an Amazon associate I earn from qualifying purchases. If you make a purchase through these links, I may receive a small commission at no extra cost to you.
This is a Sponsored post written by me on behalf of Duck Brand for SocialSpark. All opinions are 100% mine.
I finally finished a project I’ve been needing to do for years!
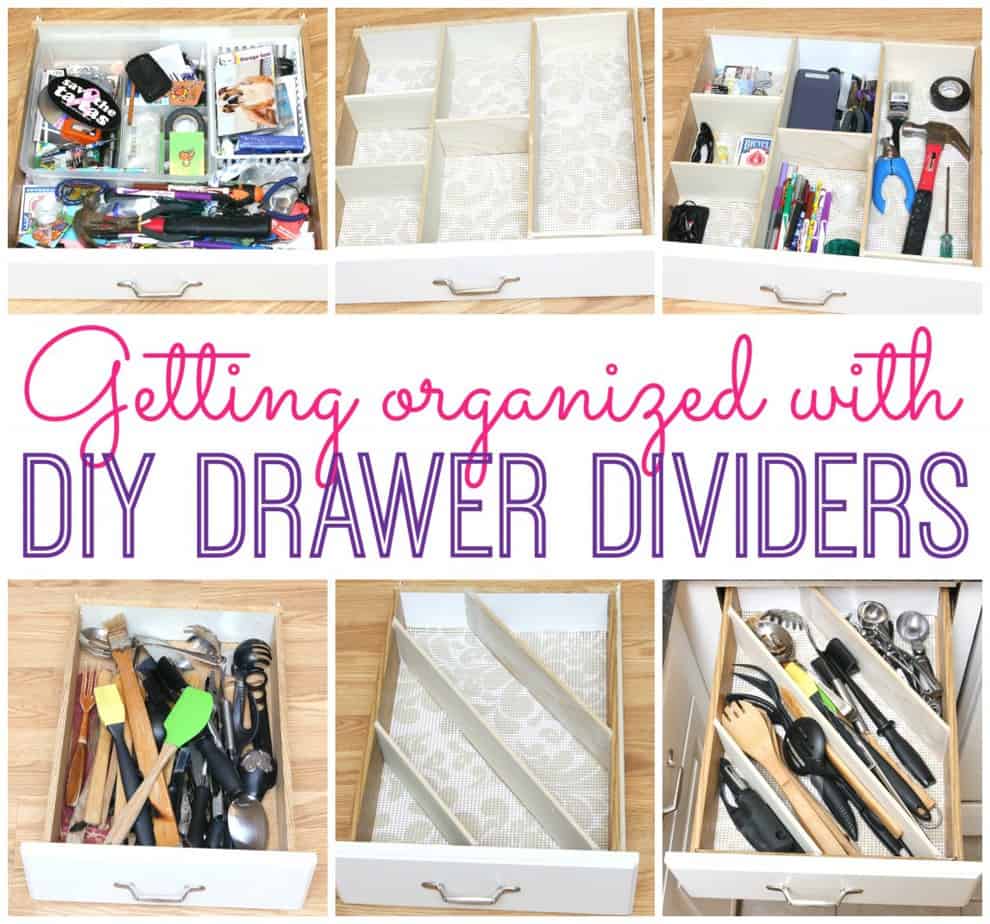
My kitchen drawers were a disaster. I could never find anything. I found a few different tutorials for DIY Drawer Dividers on Pinterest and decided it was finally time to try it. And, of course, I LOVE the way they turned out. But what’s not to love about a great DIY project and getting organized.
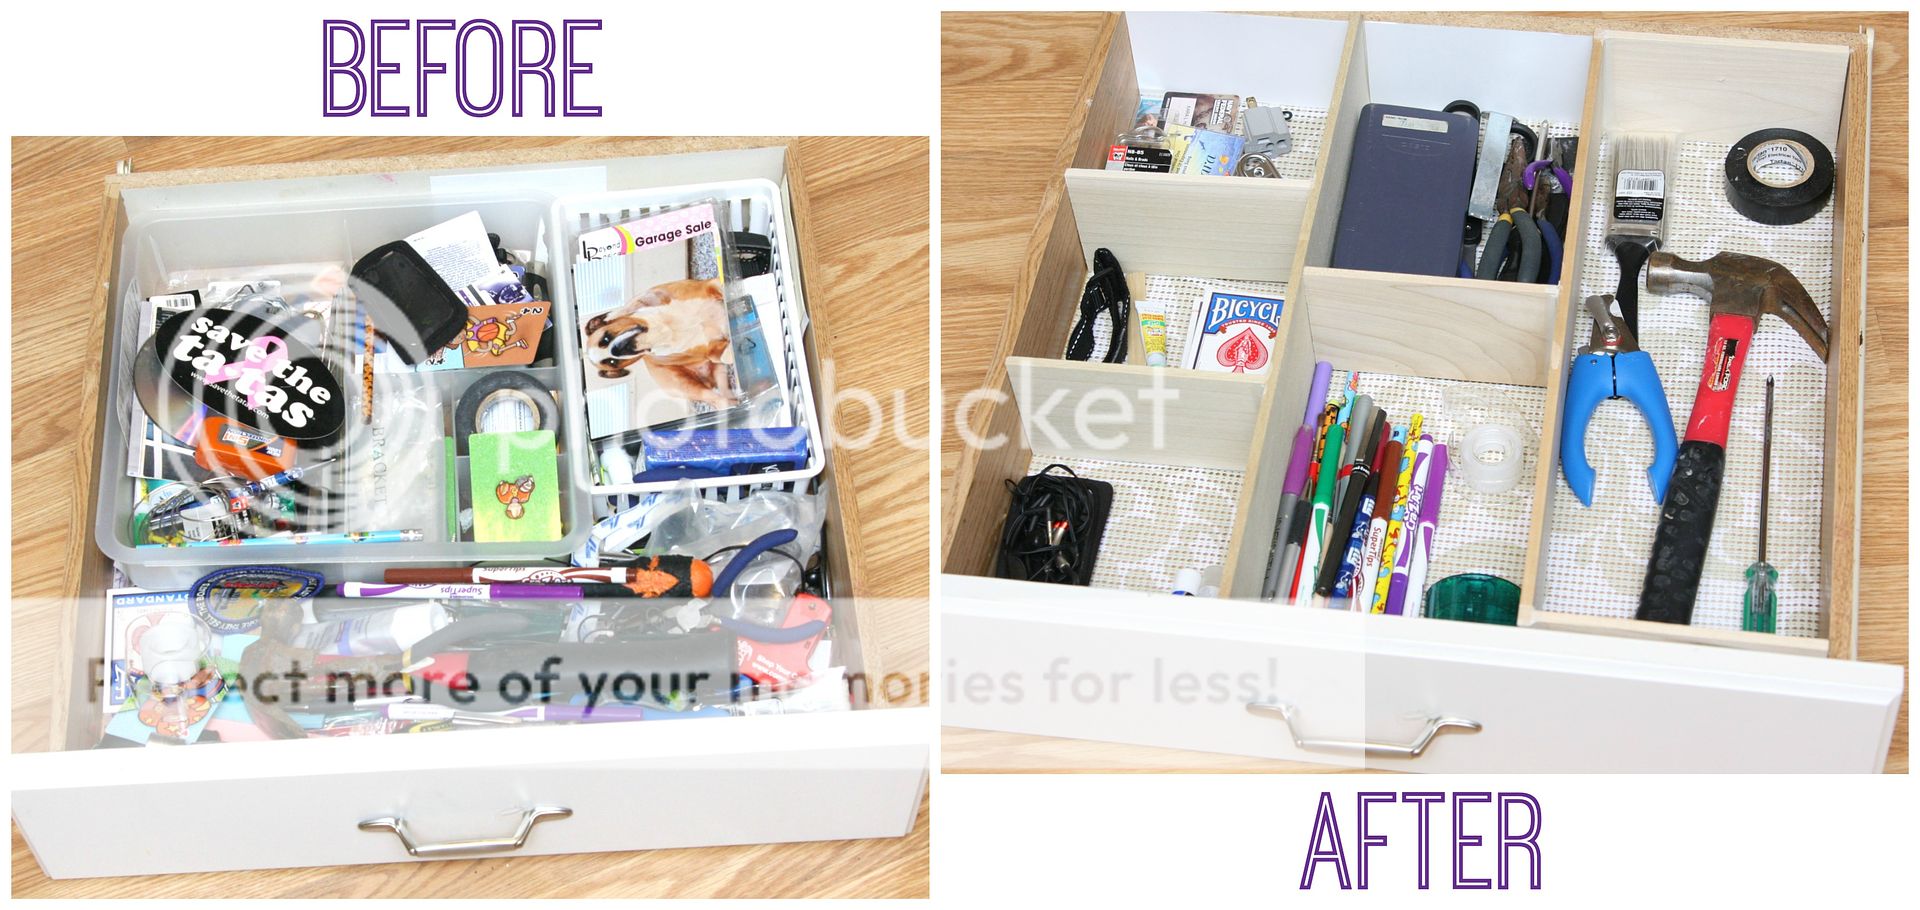
I’ve tried buying different containers and trays to organize things but they never seem to do the job so it was time to make them myself. Look at all that junk! I don’t even know what all is in that drawer!!
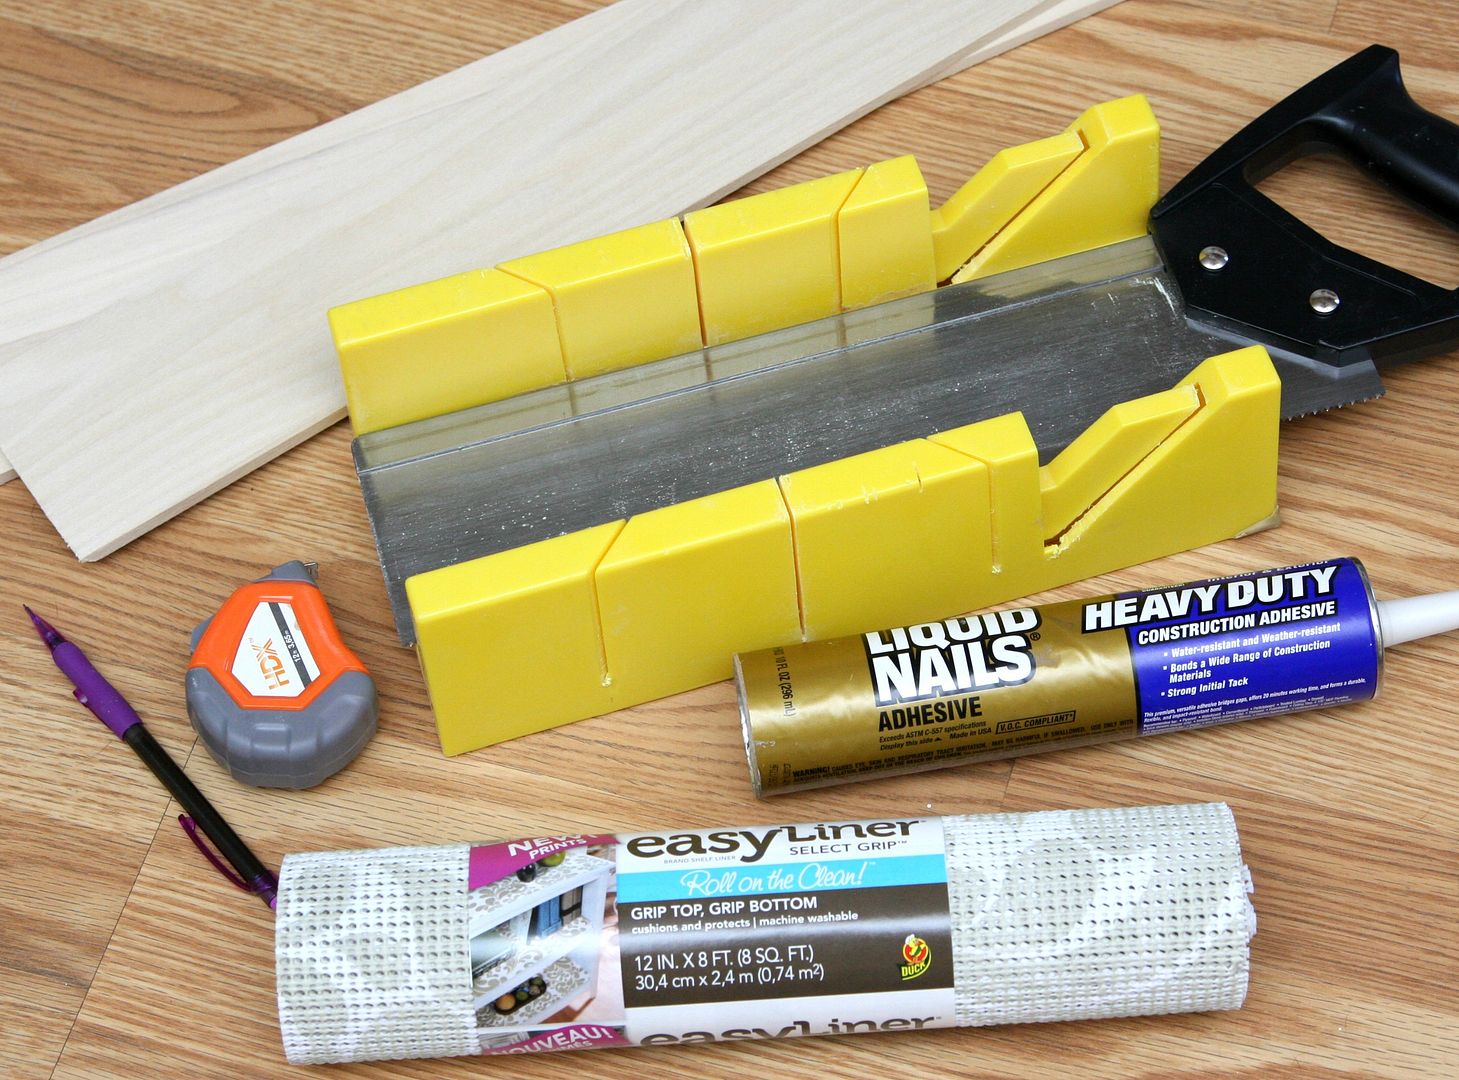
Materials needed:
- 1/4 inch poplar wood. The width will depend on your drawers. Mine was 3.5 inches wide.
- measuring tape
- pencil
- miter box saw
- wood glue
- Duck Brand’s Shelf Liner
Directions:
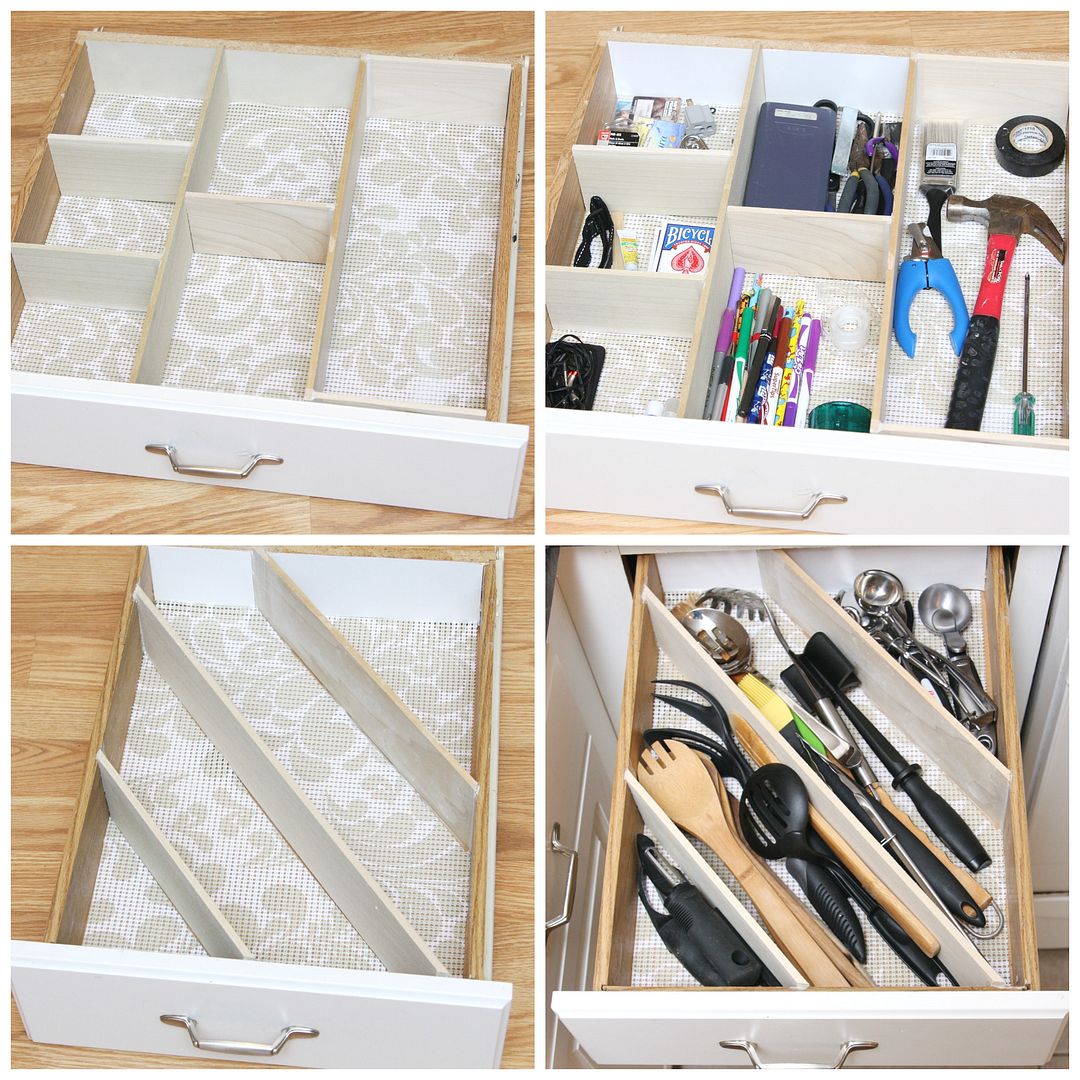
I’m going to start with my junk drawer because it was the worst drawer in my kitchen.
Step 1: Clean out the drawer and add Duck Brand’s Shelf Liner. This simple step made the drawer look better already.
Step 2: Figure out how you want your drawers divided. I decided I wanted my utensil drawer to have diaginal dividers and my junk drawer to have different sections.
Step 3: Use the miter box to start cutting the wood. I cut my longer pieces first and then cut the small piecess to fit in the spaces.
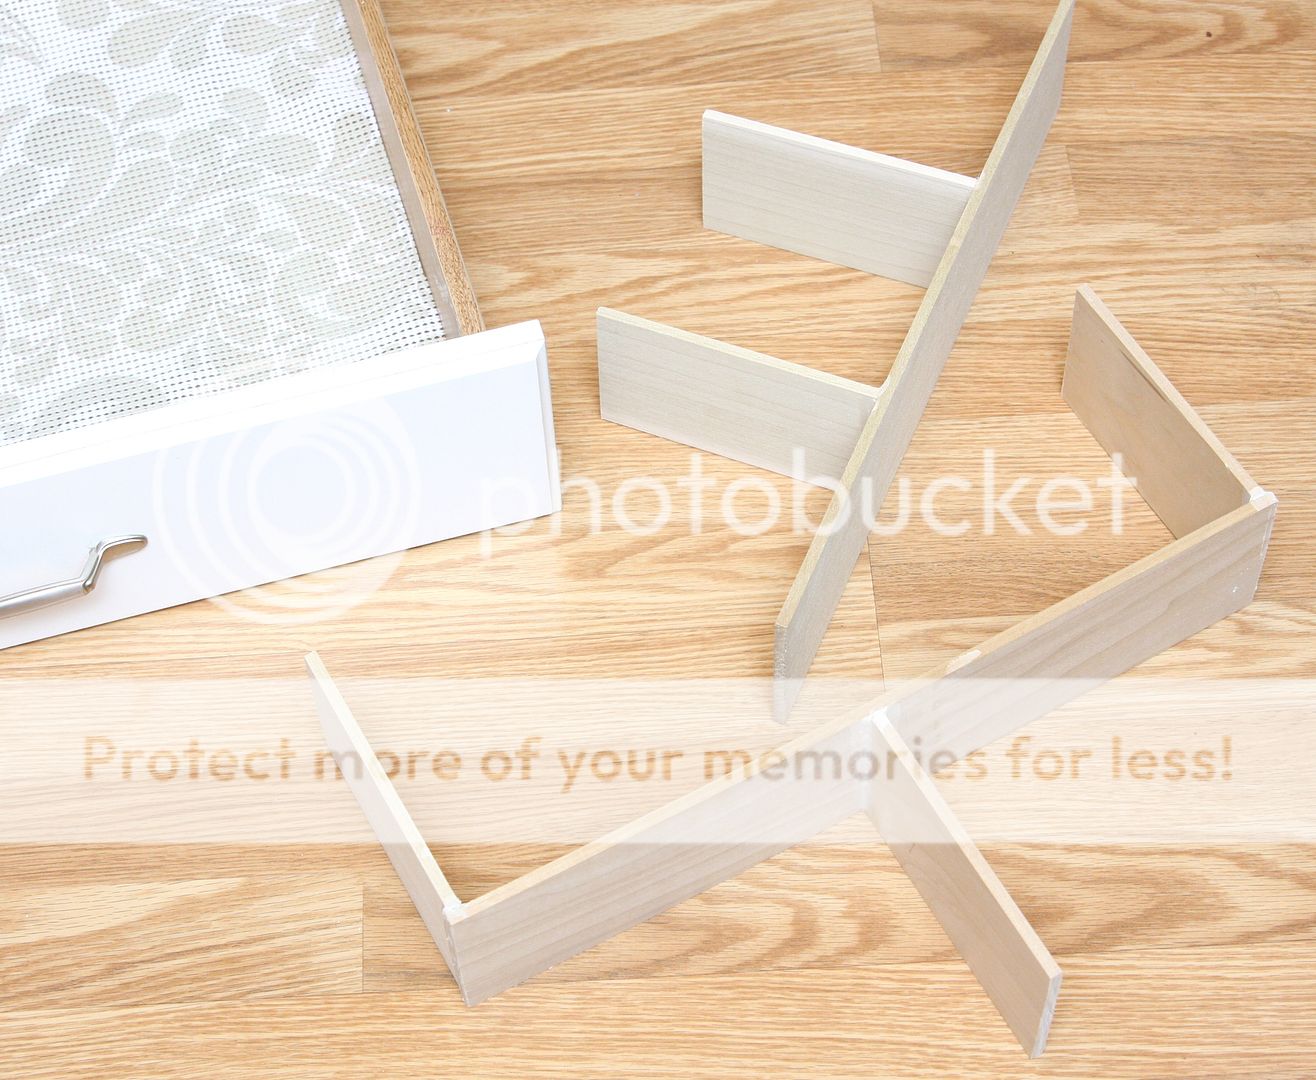
Step 4: Glue everything together using liquid nail. I glued the pieces together but I didn’t glue them to the drawer. I actually made the dividers into two seperate pieces so I could easily remove them if I wanted to.
Step 5: Once the glue is dry, you are ready to place the dividers in the drawer.
An organized junk drawer in FIVE easy steps! Woohoo!!
And for the utensil drawer, I decided to make the sections diaginal.
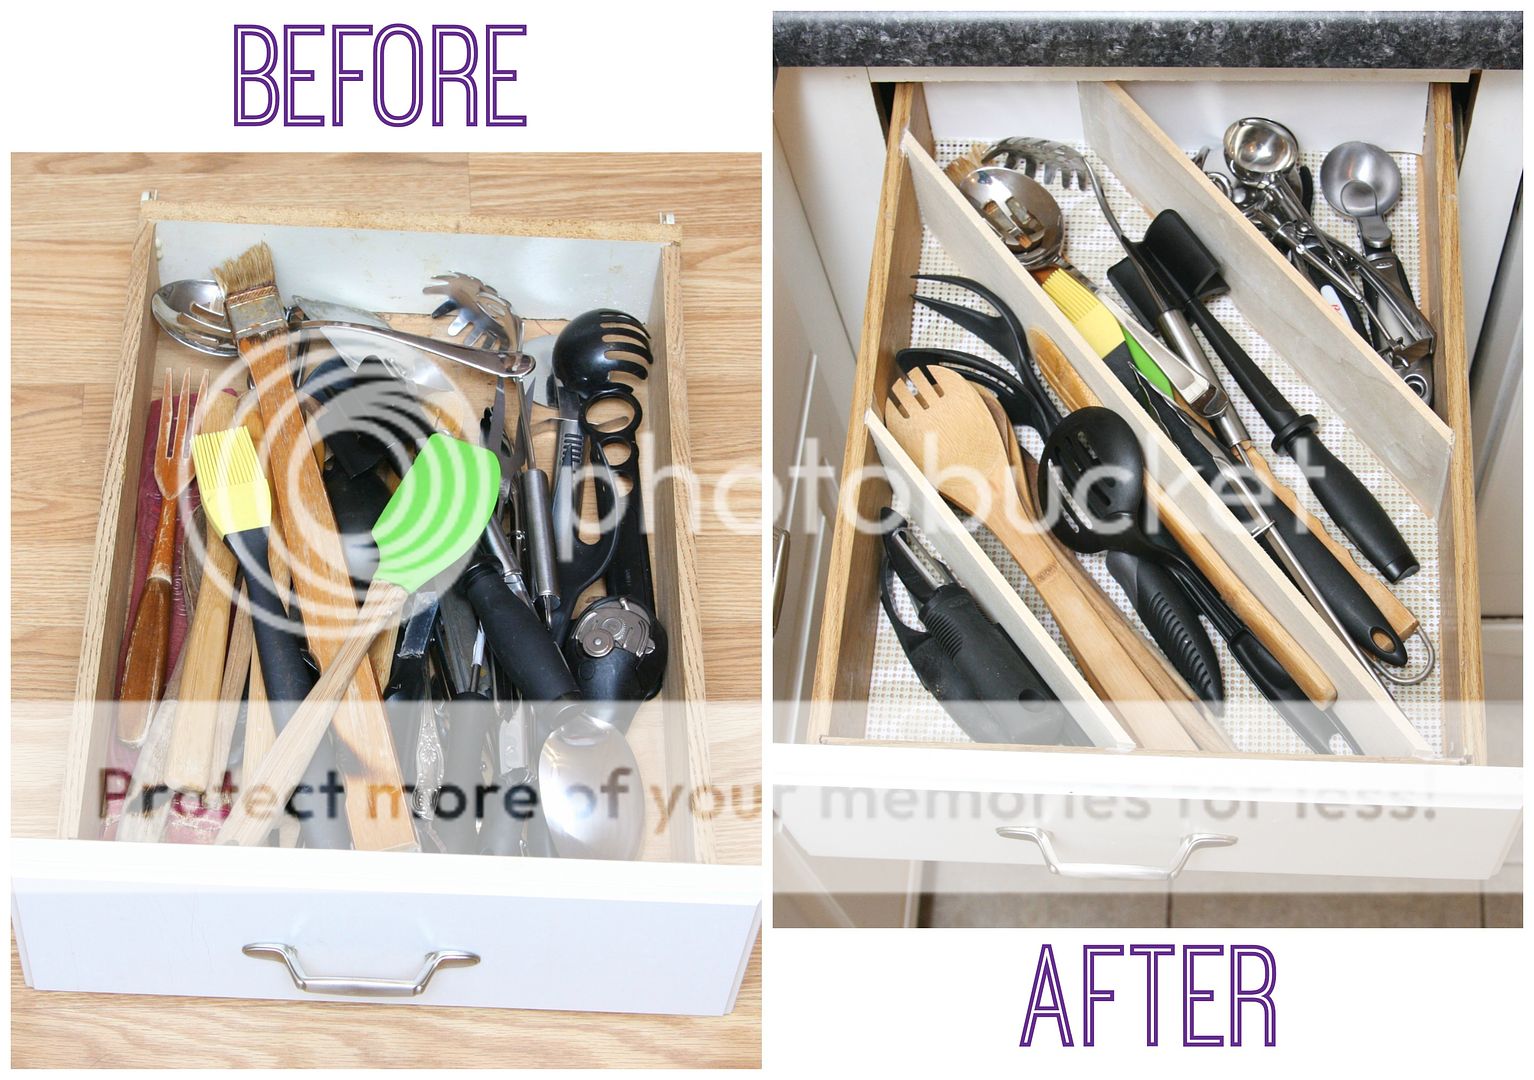
This time I used the miter box and saw to cut the ends of the wood at an angle and glued the pieces to the drawer. Then I cute the Duck Brand’s Shelf Liner to fit inside each section.
Look at what a huge difference that makes!
Finally – organized kitchen drawers! Now I can actually see how many wooden spoons I have and find stuff in my junk drawer.
I just have to say that shelf liners makes such a huge difference when organizing drawers and shelves. Duck Brand’s Shelf Liner’s are available in various colors and designs. I love how something so easy can make a boring drawer or shelf look so much better! And it makes me happy everytime I open my new organized drawers.
Now’s the perfect time of year to get things organized! Follow Duck Brand on Pinterest and Facebook for more creative ideas on how to use their shelf liners.
What projects will you be working on this summer that Duck® brand shelf liners would be perfect for!

Your drawers look awesome!! I love the diagonal dividers for your utensils. That’s perfect. Love it!! Pinned 🙂
The “after” looks so awesome!
I’m loving the angled dividers for the longer utensils!! Brilliant 🙂
These dividers are genius and such a space saver! Great organization!
Love the diagonal dividers- awesome idea! These kinds of projects are forever getting put off around here too 🙂
What a clever idea! I’m totally doing this in my kitchen!
Your drawers look fantastic and I plan on trying to copy your idea. Thank you for all your wonderful suggestions and directions.
Judith R. Cushman
I love it!